Stealing from the local children's community garden. It has now happened at a second community garden.
God, people really do suck.
I have tons of extra tomato plants I don't have room for (you know how some years, all your seedlings thrive?) so I'll call and see if they want them-but really. Stealing vegetables that children are growing to feed themselves over summer. *Shakes head*
Thursday, May 31, 2012
"Anti-Fairness"
The Defense of Marriage Act has been ruled unconstitutional by the First Circuit US Court of Appeals in Boston. This is great. This should have been obvious from the start, but I also don't believe this is the end of it-people like the feeling of power discrimination gives them.
Meanwhile, in Lincoln, Nebraska 10,000 people eagerly put their signatures on a petition to oppose the Fairness Ordinance giving protections to lesbians/gays/bi/and transgendered persons in the city. You know, fairness protections that you can rent an apartment, get medical treatment, or not lose your job. Instead, they want to put it on the ballot for a vote. Just off the top of my head, I can think of half a dozen examples of popularly supported civil rights violations.
There are plenty of things making marriage challenging in late capitalist America, but gay marriage ain't one of them.
*Seriously? How do you sign an "anti-fairness" petition without feeling like a complete_____________(Fill in the blank with whatever insult you like)? And the way they act so proud of themselves. Ugh.
Tuesday, May 29, 2012
Rum Raisin Loaf

I've been accumulating egg whites again. That isn't hard to do if you make your own pasta, but there are only so many angel food cakes and meringue shells a family can eat. I'll tell you what I never tire of eating-rum soaked raisins, that's what. I could happily skip the ice cream and just eat the raisins in rum, but my family considers that gauche, kind of like dumping salsa sauce atop a bowl of Cherrios (don't knock it till you've tried it). To save myself the funny looks (because they scrunch up their noses like poorly rabbits when I stray from acceptable uses of raisins and salsa (never together, mind) I baked a loaf cake, and used up the extra egg whites, so hooray for me, and yes, I saved out some raisins for snacking-just don't tell.
The cake itself is really moist for a white cake, though a stick of margarine can do wonders with that. Yes, you read that correct-I used margarine. I find that cakes I intend to keep for a while do better with a good quality margarine than butter. You could use shortening if you prefer-or butter, or half of each. You get the idea. What you must do is resist cutting into it for at least 8 hours, though a day would be better. The cake really does improve overnight, but you aren't going to listen are you? The loaf should be stored tightly wrapped in wax paper, then in a layer of cling film. My house is comfortable at the moment, but if it gets really warm, it would be OK to store it in the fridge. Bring the loaf to room temperature before serving. When it does finally go stale, toast it and serve with jam.
You Will Need:
1 cup raisins soaked overnight in enough rum to cover, then drained. (save the rum for the next use, or what the hell, drink it).
2 1/4 cups plain flour plus 2 tablespoons divided
1 1/4 cups granulated sugar
1 1/2 teaspoons baking powder
1 teaspoon salt
1/2 cup margarine
1/2 cup whole milk
1 teaspoon vanilla extract
4 large egg whites
Preheat oven to 350 degrees F. Grease and flour a loaf pan. I have a long Pullman loaf pan which I prefer for these cakes, but regular 9x5x3 pans work as well.
Sift together the flour, sugar, baking powder, and salt. Beat in the soft margarine, milk, and vanilla. Mix well. Add the eggs all at once and beat until smooth. Toss raisins with remaining flour. Fold in raisins. Pour into pan and bake 40 minutes or so for a Pullman loaf, 50-60 for a regular loaf. Check frequently to avoid overbaking. Cool 15 minutes in tin, then unmould onto a rack and cool completely before storing.
Old Time Sugar Cookies-World of Baking 1968
 Al least no one is going to be dropping dead from a sugar cookie deficiency disease on my watch. Yeah, this recipe makes a ton-but hey, you need to keep things like this on hand. Sugar cookie deficiency ain't nothin' nice. Trust me.
Not only are these sugar cookies delicious, they are really quick, and easy to make. You can roll them out, and cut into shapes, but I opted for rolling them into balls which are then rolled in a cinnamon sugar mixture. I found the dough sufficiently chilled after an hour.
A less successful cookie was my attempt at Alice Medrich's cornmeal cookies. I hated them. They were hard, dry, and generally unpleasant. Usually, I have good luck with her recipes, and wouldn't hesitate to try others-so long as they didn't involve cornmeal. Blech-and you could break a tooth on them.
You Will Need:
3 cups plain flour, divided
2 teaspoons baking powder
1/2 teaspoon salt
1 cup butter
1 1/2 cups granulated sugar
2 large eggs
1 tablespoon milk
1 teaspoon vanilla extract
Topping:
2 tablespoons sugar mixed with 1-2 teaspoons cinnamon
Sift together 1 1/2 cups of the flour, the baking powder, and salt. Cream the butter in another bowl and slowly add the sugar until light. Beat in eggs one at a time, then the milk and extract. Work in the sifted flour mixture. Add enough of the remaining 1 1/2 cups to make a smooth, workable dough. Don't add too much.
Chill dough at least an hour.
Preheat oven to 400 degrees F.
Roll dough into balls and dip in the cinnamon sugar mixture. Place, sugar side up on baking sheets about 1 inch apart. Bake 9-10 minutes or until the edges are lightly browned. Remove to a rack to cool.
Friday, May 25, 2012
Trifle on a Plate

I was tempted to call it a, deconstructed trifle, but knowing my audience you'd start sending me mail asking what the hell the dessert had to do with Derrida. So yeah, fuck it, I made trifle on a plate.
I made a few...OK several batches of ice cream last week, and damned if I was going to toss out egg whites. Sure, I could freeze them-along with all the other containers of frozen egg whites in my freezer (the downside of making large quantities of pasta and ice cream) but angel food cake is really so easy (almost) any idiot can can bake one and I've been rather idiotic of late. I also had really perfect peaches and blueberries to work with, and didn't feel like baking a pie. yeah, I know, I must be sick again.
I can't say there is any particular secret to making a good angel food cake, except that you should take your time adding ingredients. By adding the sugar slowly to the egg whites, and the sifting the dry ingredients over and folding a few tablespoons at a time, it prevents deflating the delicate whites. This is a good rule of thumb for most cakes that rely on eggs (yolks or whites) to rise. Slow down. If you can't, bake brownies-everyone likes brownies and you can dump it all in a single bowl.
I used the "De-Lux" (I hear that as, "deeee-lux") angel food cake recipe in the 1950 Betty Crocker Picture Cookbook, because I know it works. Employing icing sugar in place of the granulated in the dry ingredients is genius. It makes for a really light, sweet cake. We've all had tough, heavy angel food cake. If I wanted that, I could buy one at the supermarket.
I've baked this cake before, HERE. This time, I used coconut extract in place of the vanilla.
The custard is pretty straightforward:
2 egg yolks
2 tablespoons cornstarch (cornflour)
1/4 teaspoon salt
1/2 cup sugar
2 cups milk
1 teaspoon coconut extract
1/2 teaspoon vanilla extract
In a small saucepan, combine eggs, cornstarch, salt, sugar. Whisk in milk. Heat over medium heat and bring slowly to a boil, whisking constantly to prevent it scorching. Boil 1 minute. Remove from heat, stir in extracts. Remove to a bowl, cover with cling film pressed on the surface, poke a few small holes with a sharp knife to vent. Chill until ready to assemble trifle.
The Fruit:
Toss ripe peaches and blueberries with the juice of 1/2 a lemon. Add sugar to taste. Let sit at least 30 minutes to release juices.
The whipped cream:
Beat chilled whipped cream in a chilled bowl with chilled beaters (or whisk). Add icing sugar to taste and a small bit of either vanilla or coconut extract.
Assemble:
Slice angel food cake carefully with a serrated knife to prevent squishing (yeah, that's a technical term, don't believe me go ask Harold McGee). You'll need two thin-ish slices for each serving. On one slice, dollop some custard. Top with some fruit and another bit of custard. Arrange second slice atop first. Add a bit more custard, more fruit, and the whipped cream (stop channeling my mother and use a reasonable amount of whipped cream. A teaspoon is not a reasonable amount of whipped cream. Maybe a bit more...closer...yeah, just dump it over the cake. That's better). Drizzle some of the juice from the fruit over it all so you can make your dessert all elegant-n-stuff.
Thursday, May 24, 2012
Rye Starter
Recently, I converted a bit of my white sourdough starter to an all-rye. I swore I wouldn't be the person with three or four jars of starter lined up in the fridge, but here I am. I've been able to experiment with some interesting breads.
My Holy Grail is an all-rye bread that isn't heavy and damp inside. I'm surprisingly close. If you haven't worked with sourdough rye, be warned-it sticks to your hands like clay. Because it is so difficult to handle, I've taken to doing folds with a rubber spatula, and enough flour just to keep it from sticking. Most of these loaves have been two day efforts, sometimes three. I'm aiming for something other than the caraway rye we're familiar with in the US, or a Swedish limpa bread. Those are both wonderful breads, but I'm trying for something more complex in flavour.
The breads I've baked so far have been good-with decent oven spring considering how little gluten they have (I've added vital wheat gluten in some versions, though it wasn't nearly as helpful as I'd hoped)but I don't want, good I want, great. My poor family have been eating rye day after day.
It should be interesting to bake a white bread with the rye starter. I've been feeding it twice a day, but because it is so heavy it is difficult to tell if it is doubling, or needing additional feeding. I may switch to 3x a day in warmer weather if I keep it on the kitchen counter. I've kept the starter rather firm, as that is how I keep the white starter-perhaps it would be better as a liquid? You see? This is what keeps me up at night-soudough starter!
Anyone have experience maintaining a rye starter, and any wisdom to share?
Monday, May 21, 2012
Again?
I don't think we've had a day in the last month when at least one member of this family hasn't been sick. When I think we've done with the last of it, we come down with something new. For people who never go anywhere, we sure get sick a lot.
During a lull (at least I felt OK) I made it over to the yearly KZUM book sale fundraiser. The find-of-the-day was a stack of pristine Jack and Jill Magazines from 1964-1966. The puzzles weren't even marked. Then, I hit the record bins. At ten for a dollar in the waning hours of the sale, I came home with a stack of fantastic vinyl. My turntable was a casualty of the tornado, but after four years, I think it high time to replace it-now I have a proper incentive.
Oh, and books! You know I bought books. Dear God, I bought some books. Very many books. The problem of course is that it is a bag sale, and you feel pressured to fill the bags as well as possible. Mr. ETB reckons this was probably the only time many of those titles were carried in the same bag. I told him not to buy the Wittgenstein book, but I never imagined I'd need to warn him off the Seven Habits of Highly Effective People. I chalk it up to his having a fever. At least he appreciated the absurdity.
During the first bout of plague, or whatever the hell we have, Danny was too weak to do much save for lying in bed eating ice cream. I put in Fantasia for him to watch, and he adored it. Ordinarially, Danny would have met it with a shrug, but sick in bed, in a dark room, I think he was actually in a better mood to appreciate the movie. I'm pretty sure he watched it as a toddler, but didn't have any memory of it. This time around, if he ends up camped out in my bed I have a copy of Jacques Tati's, Playtime. I think that's perfect viewing with a high fever, especially the bit with the carousel of cars.
Ah well, I'm off to freeze ginger ale in a metal tray to make invalid slushies.
Chewy Oatmeal Chip Cookies
I made these a week ago, and kept in an airtight tin they are still as fresh as the day I made them. I used mini chocolate chips from a nut-free supplier-Enjoy Life (also gluten free, vegan, and dairy free) which seemed like a good decision. The chips have a surprisingly strong cocoa flavour, though they remain a bit firmer after baking than ordinary chocolate chips. I'm not being compensated by Enjoy Life Foods in either money or product. I purchased these at Hy-Vee in Omaha for $3.99 a bag.
The recipe comes from, Chocolate by, Nick Malgieri.
I've been pleased with everything I've baked from this cookbook including a recipe for chocolate sables. The sables, good as they are are still not as perfect as the Dorie Greenspan sables, which is my "go-to' sables recipe (Oh what? Like you don't have a "go-to" recipe for sables?) so I'm not including it here.
8 tablespoons unsalted butter, softened
3/4 cup light brown sugar
1 large egg
1 teaspoon vanilla extract
3/4 cup plain flour
1/2 teaspoon bicarb
1/2 teaspoon cinnamon
1/4 teaspoon salt
1 1/2 cups rolled oats
1 cup chocolate chips (6 oz)
1 cup dark raisins
Set racks in oven in upper and lower thirds. preheat oven temperature to 350 degrees F.
Beat butter and sugar until mixed, then beat in egg. beat until smooth. Stir in flour, bicarb, cinnamon, and salt.
Stir in oats, chips, and raisins. Drop by tablespoons onto paper lined (I just greased my pans) sheets. Use the back of a fork to slightly flatten the cookies. Bake about 10 minutes until golden, and still moist. Cool on pans. Store between sheets of wax paper in tins.
Friday, May 18, 2012
Venison Matambre
Yep, I could have arranged those vegetable neater.

Sure, you could use flank steak like a normal person, but I have a freezer full of Bambi that needs to get used before next hunting season. I had irregular pieces of venison to work with, but between pounding the hell out of them with the side of a mallet, and careful layering, I was able to get the thing to roll-up. Extravagant use of butcher's twine didn't hurt either. You don't ear extra points for tying neatly-you earn points for a matambre that stays together when you slice it, which mine did. So there.
I made a few adjustments to the original which comes from a 1969 Time Life Illustrated Library of Cooking. I only own volume one, as my mother only bought one volume. I suspect this was a supermarket giveaway that you had to save register receipts for. She must have looked at the matambre, beef birds with pea puree, and potted pork before deciding it wasn't for her. I only found the cookbooks after she died (she had quite a few stashed away) which was twenty years ago next week. I don't know which came as a bigger shock, her death, or her hidden cookery book collection. Both caught me off guard in terms of impossibility.
This can be served warm or cold. Tango dancing optional (but really, why wouldn't you?)

You Will Need:
2 two lb. flank steaks of beef or venison
1/2 cup malt vinegar
1 tablespoon finely chopped garlic
2 teaspoons dried thyme
1/2 pound fresh spinach
8 scraped cooked whole carrots (you can use them uncooked if they are thin, and you halve them lengthwise)
4 hard cooked eggs cut lengthwise into quarters
1 large onion sliced 1/8 inch thick and sectioned into rings
1/2 cup finely chopped parsley
1 teaspoons crumbled hot pepper (I had ancho)
1 tablespoon coarse salt
3 cups beef stock
1-3 cups cold water
Butterfly the steaks carefully, but if you screw-up, don't despair as you can patch the holes when you roll it all up. Open the steaks. Place them between 2 sheets of wax paper and with a mallet or cleaver, pound the living daylights out of them (taking care not to tear them if possible).
Lay one steak cut side up on a non-reactive baking sheet or 9x13 pan (they said a jelly roll pan, but no one has room for that in the fridge, so I changed it). Sprinkle it with half the vinegar, then scatter half the garlic and thyme over it. Cover the meat with the other steak, also cut side up and repeat with remaining vinegar, thyme, and garlic. Cover the pan and frdige it at least six hours, or overnight.
Preheat oven to 375 degrees F. Lay the steaks end to end overlapping by about 2 inches. Pound the joined ends together. Wash the spinach and pat mostly dry. Spread the leaves over the meat. Arrange the carrots across the grain in rows 3 inches apart. Place eggs between the rows of carrots. Scatter the onion rings over it all. Sprinkle the surface evenly with parsley, salt and chillies. Carefully roll the steaks, jelly roll fashion into a long cylinder. Tie securely with butcher's cord at 1 inch intervals. Run it back through at the end and flip over, running it through again. This is overkill, but eh, whatever. Trim off excess cord.
Place in a heavy casserole dish that will accommodate the roll and liquids. It should have a tight fitting lid, or cover it with foil. Pour in the stock to surround the venison, this should come 1/3 of the way up the roll. Add water if needed. Cover and cook about i hour or until tender. Let it rest 10 minutes before snipping away the cord. Slice into 1/4 inch slices and serve hot or cold.
Tofu Biryani

Well of course it isn't traditional. I also omitted the cashew nuts, so it is a nut-free Biryani as well.
This is a two-day project, but unless you have a particularly greedy bunch to feed, it should provide you with several days of leftovers. That makes the effort seem worth it to my mind. I used tofu because I'm now wild about seitan "meat" replacements. I have no idea how this would work with them, but if you try it, I'd be interested to hear how it turned out. When re-heat this, add a few drop of olive oil to a large pan and give it a blast of heat before reducing it to low. This will help it maintain a crispy bottom layer of rice.
Marinade:
1/2 teaspoon ground cardamom
2 small onions, finely minced
3 cloves garlic, finely minced
3 tablespoons (not a misprint) finely chopped fresh ginger (peel it first)
1/4 teaspoon ground cloves
1 teaspoon ground black pepper
1 1/2 tablespoons poppy seeds
1/4 teaspoon nutmeg
2 chicken flavoured (or veggie) soup cubes, crushed and diluted with 2 tablespoons water
2 tablespoons malt vinegar
2 tablespoons olive oil
8 ounces plain yoghurt
Mix it all together really well. Take a package of extra firm tofu, cut it into 4 slices and press it dry under weights. Mix with marinade and layer in a non-reactive pan (glass is good). Chill overnight.
Next day, remove the tofu from the marinade (reserve the marinade) and cut into small cubes. In a heavy, heat proof pan (I used a Dutch oven) bake in a 400 degree f. oven for 30 minutes, stirring a few times to allow for even browning.
Meanwhile, slice 3 onions as thinly as possible. Measure out 1/3 cup of olive oil. Remove 3 tablespoons. You will use this to fry the onions. Set aside 3 tablespoons of raisins, and 1/4 teaspoon cardamom to fry with the onions.
Remove the tofu from the oven and stir in the reserved marinade, and the reserved oil. Cover and let sit until needed. Heat 1/4 cup of milk, 1 teaspoon saffron threads, and 1 teaspoon of sugar just until sugar dissolves. Let steep 5 minutes or so.
Meanwhile, make the rice. Boil 1 1/2 cups long grain while rice in enough water to cover by several inches. Cook 7 minutes, then drain well. Preheat the oven to 300 degrees F.
Spoon the rice over the tofu and marinade. Add the milk/saffron and mix well to distribute the yellow colour. Cover dish tightly, and bake 1 hour. Meanwhile, make the onions.
In the reserved 3 tablespoons of oil, fry the onions, cardamom and raisins over very low heat until they begin to soften and colour. This should take about 30 minutes. At the end, turn up the heat to really fry the onions until deeply browned. Remove to a plate covered in absorbent paper (I use paper lunch sacks) . Use this to top the Biryani. Serve with yoghurt,
Chocolate Cream Cheese Cake-A World of Baking, 1968

This is a substantial cake. That means, heavy in case you didn't get my attempt at being a stylish writer. Being substantial (or heavy) isn't a bad thing when it comes to a chocolate cake, mind. Could I have gone with a seven minute frosting for a better balance than a thick sour cream number that has nine ounces of semi sweet chocolate and 1/3 of a cup of butter along with the sour cream? OK, clearly you guys don't get my writing style...you aren't expected to answer that. Yes, surely I could have made this cake lighter, but what point is there in eating cake if you're not going to spend the remainder of the evening fully aware that you've just consumed cake. I mean, if you want light, go eat a bloody rice cake. This is cake for people that want cake. And chocolate. And sour cream, butter, cream cheese...
I was left with quite a bit of extra frosting as I used apricot jam for the centre (I just made 8 pints of the stuff, what did you expect me to use?). I couldn't bear to toss it out, but I have no idea what to do with the remaining two cups of frosting. I doubt it would freeze well. Anyone want to come over and have frosting shots? The stuff firms up really well, I wonder if it could be dipped in chocolate like truffles?
This is the second cake I've baked from A World of Baking by, Dolores Casella. I also own her book, A World of Bread, but have yet to bake anything from it. Weekend project, perhaps. I made a few changes in the recipe such as using unsalted butter, regular sugar, and semi-sweet rather than sweet chocolate.
Let's make some damn cake, shall we?
You Will Need:
For the Cake:
2 cups cake flour
1 teaspoon baking powder
1/2 teaspoon bicarb.
1/4 teaspoon salt
4 ounces semi-sweet chocolate, melted
1/2 cup unsalted butter
1/2 pound cream cheese
1 1/2 cups granulated sugar
2 large eggs
1 teaspoon vanilla extract
1/2 cup whole milk
Preheat oven to 350 degrees f. Grease and flour 2 9 inch pans. Set aside. Sift together the flour, baking powder, bicarb, and salt. Set aside. In a large bowl cream together the cream cheese and butter. Slowly incorporated the sugar. Then, beat in the eggs one at a time. Add the vanilla. Beat in the chocolate until well mixed. Add the dry ingredients alternating with the milk starting and ending with the dry. Pour into pans, tap gently on counter to release air bubbles. Bake 30-35 minutes or until it tests done. Cool in pans 10 minutes before turning out on a rack to cool. The book says 5 minutes, but my experience says 10. Do as you see fit. Cool completely before filling and frosting.
For the Frosting:
9 ounces semi-sweet chocolate, coarsely chopped(the original called for chips, but I used Baker's Chocolate)
1/3 cup butter
3/4 cup sour cream
1 teaspoon vanilla extract
1/4 teaspoon salt
3-4 cups icing sugar, sifted
In a heavy bottomed pan (or using a double boiler if you are too ham fisted to manage melting chocolate without screwing it up) melt the butter and chocolate over low heat, stirring to prevent scorching (a heat-proof spatula works really well for this). Remove from heat and cool slightly. Blend in the sour cream, vanilla, and salt. Gradually beat in the icing sugar until the frosting hold a shape. Done properly, this is a lovely frosting that swirls easily.
Wednesday, May 16, 2012
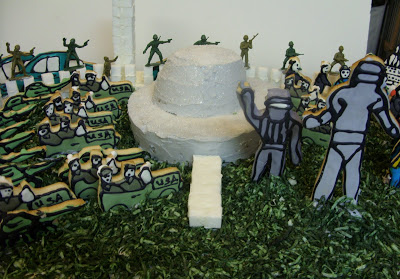
Jubilee Sick Bag
Memorabilia has improved in the span of 25 years. Last go round, I purchased some ceramic mug piece of crap. I really want one of these to pass along to my grandchildren some day.
"Do you remember the diamond jubilee Gran?" they'll ask, and from some desk drawer I'll retrieve the sick bag. No one cares about a stupid collector's mug.
"Do you remember the diamond jubilee Gran?" they'll ask, and from some desk drawer I'll retrieve the sick bag. No one cares about a stupid collector's mug.
Tuesday, May 15, 2012
Apricot Pie
You bought too many apricots for jam making, didn't you? I know, I always over-purchase as well. If you can gather up three cups of sliced apricots, you can make this pie. This is a very plain sort of pie that really relies on the quality of the fruit.
from better Homes and Gardens Pies and Cakes, 1966
You Will Need:
Pastry for a 2 crust pie
3 cups apricots, sliced
1 cup granulated sugar
3 tablespoons plain flour
1/4 teaspoon nutmeg
1 tablespoon lemon juice
1 tablespoon butter
preheat oven to 425 degrees F. Line pie plate with bottom pastry, and fill with apricots. Combine sugar, flour, and nutmeg. Sprinkle over fruit. Drizzle top with lemon juice, then dot with butter. Cover with top crust, cut vents and bake 25-30 minutes or until done. I brushed mine with heavy cream and sprinkled it with coarse sugar before baking.
Things to do With Apricot Peels
You've made your yearly batch of apricot jam (You have, haven't you? Don't count on the local crop being any good this year with our crazy weather-grab the California ones when you see them, or you may be apricot jam-less this year. I don't want you to be apricot jam-less because you'll just be asking for some of mine. The apricots I bought were exceptionally nice-so hurry!) and now you are looking at a pile of peels wondering if they can be put to use anywhere besides the compost pile.
Why Yes, you can put those apricot peels to good use. Do you like candy? Of course you do, you wouldn't be reading this blog if you didn't. How about fruit puree? Good, keep reading.
Take your apricot peels and place them in a pot with 1/4 cup water and a tablespoon of lemon juice for each quart of peel. Cover, bring to a boil then reduce to a slow simmer. Cook until quite soft-about 15 minutes. At this point, decide what you wish to make-candy, or puree.
For candy:
Strain the peels through a jelly bag (or a cheese cloth colander over a bowl) several hours. Measure 2 parts sugar to 1 part juice and bring to a boil slowly in a large pot, whisking until the sugar is dissolved. Cook until the mixture sticks to a spoon (well beyond the jelling point. I like to tell people it should almost smell like a cross between gelatine, or something burning off the hob that previously spilled. It should smell really strongly of burning, without actually burning. I know, that's vague. Cook it until it sticks to the spoon rather than sheeting, and you'll be good, or just pull it off the heat at the first whiff of burning.
Pour the mixture into a parchment lined 8x8 pan. Cool completely at room temperature, then chill, uncovered in the fridge overnight. Next day, cut out your candy-I use the centre of a donut cutter, but a thimble works too if you're trying to make gumdrops. Return the candy to the fridge on a parchment lined plate. Chill overnight again. Next day, roll in sugar and return to the fridge on plate again for several hours. Give candy another roll in the sugar, and then pack between layers of waxed paper in an airtight container. Store in fridge.
For the puree:
Run the peels through a food mill. Pack into freezer containers leaving 1/2 inch headspace. Use for chiffon pies, jelly moulds, or sorbets.
How to Freeze Turnip Greens
Faced with a bumper crop of turnip greens, I decided to freeze the greater part of the harvest. This method works well for most greens, except for spinach which only needs a few seconds in boiling water.
Wash and trim your greens. Turnip greens must be removed from the stalk. I don't bother with chopping as they tend to tear as I strip them, but if you prefer chopped greens I find it easier to manage after blanching.
Bring a large pot of water to a boil. meanwhile, have ready another large bowl filled with ice water. Submerge the turnip greens for 2 minutes, then remove with a slotted spoon (may as well re-use the water if you're preparing a large number of greens) and place in bowl of ice water. When greens are cold, drain well.
The greens should have some water on them, but not enough that you will be packing them in ice. Squeeze any excess out lightly with your hands, then pack in a freezer bag. Remove as much air as possible, then tape closed in addition to the seal. I like to double bag mine just for the sake of preventing air getting in, but that's me. Label the greens and use them withing six months or so of freezing.
Thursday, May 10, 2012
About the Previous Post
When I clicked to publish, it brought up the content-driven Google ads on my screen. I'm guessing it was, "Scotland" that made the programme decide I was looking for "Low income housing", and "depression treatments."
Strangely, no adverts for Scotch.
Strangely, no adverts for Scotch.
He Spends A Lot of Time in Scotland...
...so he is interested in the weather.
Go on, click it-you'll pee your pants laughing.
Go on, click it-you'll pee your pants laughing.
Wednesday, May 09, 2012
Send "Em to Bed Without Dinner
Geez. I like to put halfway decent dinners on the table, but I don't suffer anxiety attacks over it, and my child has never had a tantrum over the menu. Seriously? A tantrum? The Boston Globe published it, it must be true.
This is what I have been getting at with respect to the "mommy" crap being published. This cannot be common enough to warrant a feature, and a follow up article with "advice." Hey, I have some advice-tell them they can eat it, or go hungry. I'm trying to imagine my mother's reaction to her children having tantrums over the meal being served, or accommodating us each with different dishes. I'm sorry, I can't imagine it, because it is so damned far outside of reality I'd need to be on drugs to get close to that level of imagination. My sister really hated sardines and crackers for lunch, but she ate them without complaint.I wasn't too thrilled with skinless chicken stewed in V-8 juice with watery courgettes, but I ate them without complaint.Maybe something happened since the 60's to change the dinnertime dynamics...wait scratch that, I know what happened since the 60's to change things-the 70's, 80's 90's and well-here we are in happy tantrum land.
So do these little boors put on the same display of manners when they dine at the home of their little friends? If you feel free to insult your mother's cooking, do they somehow manage to down the offensive food away from their family kitchen? I'm no parenting expert, (you probably figured that out by now, eh?) but I have to wonder if these children have figured out a swell way to manipulate their mothers. For fuck's sake-the guilt is supposed to be directed from mother to child, not the reverse. That's parenting 101.
A tantrum. Seriously.
Cracker Crust Corn Pie-Farm Journal Country Cookbook 1959
Tasted better than it looks. Actually, it looked fine on a plate, but I couldn't be arsed to cut another slice after dinner just to take a pretty photograph.

Calling this, "Pie" will require a bit of imagination, but I suppose the fact it is baked in a tin will satisfy most cookbook editors. If pressed, I'd call this a baked corn custard. Still, whatever you choose to call it, this is a delicious way to make use of fresh corn. I haven't tried it with frozen or tinned, but I do suspect it would seem less delicate.
I rarely have saltine crackers at home, and they tend to go stale before the box is finished. I had 1/2 a box of stale saltines and I'm pleased to report they found new life with the addition of a stick of butter. Isn't it amazing how well a stick of butter can improve things? I can't tell you how many times I'm nibbling on a rice cake and think, "This would be so much better thickly spread with butter!" And it really works. Rice cakes really are better thickly spread with butter.
As I've made other corn pies, I'll include links to them at the bottom of the page.
You Will Need:
1 1/4 cups fine cracker crumbs
1/2 cup melted butter (hooray!)
2 tablespoons butter (there's more!)
1 1/4 cups milk (you may as well use whole milk at this point, you're already in it for a stick of butter)divided
2 cups raw, fresh corn (2 or 3 ears)
1/2 teaspoon salt
2 tablespoons flour
1/2 teaspoon onion salt (I omitted this)
2 large eggs, beaten
Preheat oven to 400 degrees F.
Combine crumbs and 1/2 cup melted butter. Mix well. Reserve 1/2 cup for topping. Press the rest into a 9 inch pie plate. In a saucepan, combine 1 cup of the milk, 2 tablespoons butter, corn, and salt. bring to a boil. Reduce heat to a simmer and cook 3 minutes. Add flour to remaining milk and stir to make a smooth paste. Add slowly to hot corn mixture, stirring constantly. Cook 2-3 minutes or until thick. Cool slightly, then slowly stir in the eggs until well combined. Pour mixture into crumb lined pan. Top with remaining crumbs and bake 20 minutes or until set.
And would you look at the beautiful crumb on this bread I baked today? I could never do that again in a million years.

Other Corny Favourites:
Amish Corn Pie
Tomato and Corn Pie
Chilean Corn Packets
Corn Pudding
Corn and Grits Timbales
Turnip and Beet Greens in Cream Sauce
Beet Greens
 Turnip Greens

I'm going to be looking at greens quite a bit in the next week or so, as I'm harvesting a bumper crop. While greens may be blanched and frozen (I'm doing that as well) they are best prepared fresh, in my case from the garden. Greens don't have very long shelf life, so only purchase (or pick) what you can use in a day or so.
 The finished dish.
Some people feel that turnip greens are too assertive to be enjoyed without another green to mellow them. I don't believe this, nor do I subscribe to the idea that turnip greens must first be blanched or they will be bitter. That said, I did mix them with other greens, and I did blanch them first, but bear in mind they won't be inedible if you skip it. Just don't try to eat turnip greens raw as they have prickly leaves (that falls off in cooking) and they tend to be rather tough.
You Will Need:
Turnip greens, trimmed from stalks
Beet greens
1/2 cup red onion, finely minced
1 tablespoon butter
Salt/pepper
1 cup vegetable broth
1 tablespoon flour
1/2 cup milk
1/2 cup heavy cream
Blanch the greens in boiling water. Return to a boil, then drain. When cool, chop greens and squeeze to remove as much moisture as you can. Meanwhile, in the same pot (why dirty another?) melt the butter and cook the onion in it until soft (about 2 minutes). Add the green and the broth. Cover, leaving a small vent and cook about 20 minutes or until greens are tender. Remove lid, increase heat and cook off remaining liquid. Reduce heat to low, stir in the flour and cook, stirring until well mixed-about 1 minute. Slowly stir in the milk and cream until well mixed. Cover, leaving a small vent and over the lowest heat, cook until thickened-about 2 minutes. Serve warm.
 Turnip Greens
I'm going to be looking at greens quite a bit in the next week or so, as I'm harvesting a bumper crop. While greens may be blanched and frozen (I'm doing that as well) they are best prepared fresh, in my case from the garden. Greens don't have very long shelf life, so only purchase (or pick) what you can use in a day or so.
 The finished dish.
Some people feel that turnip greens are too assertive to be enjoyed without another green to mellow them. I don't believe this, nor do I subscribe to the idea that turnip greens must first be blanched or they will be bitter. That said, I did mix them with other greens, and I did blanch them first, but bear in mind they won't be inedible if you skip it. Just don't try to eat turnip greens raw as they have prickly leaves (that falls off in cooking) and they tend to be rather tough.
You Will Need:
Turnip greens, trimmed from stalks
Beet greens
1/2 cup red onion, finely minced
1 tablespoon butter
Salt/pepper
1 cup vegetable broth
1 tablespoon flour
1/2 cup milk
1/2 cup heavy cream
Blanch the greens in boiling water. Return to a boil, then drain. When cool, chop greens and squeeze to remove as much moisture as you can. Meanwhile, in the same pot (why dirty another?) melt the butter and cook the onion in it until soft (about 2 minutes). Add the green and the broth. Cover, leaving a small vent and cook about 20 minutes or until greens are tender. Remove lid, increase heat and cook off remaining liquid. Reduce heat to low, stir in the flour and cook, stirring until well mixed-about 1 minute. Slowly stir in the milk and cream until well mixed. Cover, leaving a small vent and over the lowest heat, cook until thickened-about 2 minutes. Serve warm.
Tuesday, May 08, 2012
We're Doomed (Still)
Lenore at Free Range Kids has a link to an article at a "mommy site", that boils down to: Men who speak to children are paedophiles. No really, I'm not making this up.
Personally, I try to avoid reading parenting sites as they make me want to reach up, and yank out my uterus, with both hands. If they aren't promoting the latest terror awaiting your children, they're setting up the cyber pillory for women who balk at being reduced to the roles of incubators and protection units. God help you if you fed the kid formula, or had an elective c-section. Depending where you live, your foetus has more rights than you do. And now you're going to let them talk to strangers? Male strangers? If this were a mommy blog I'd have to follow that with sixteen exclamation marks.
So remember, if an unfamiliar old man starts asking your kid about multiplication tables, he's probably grooming him for sexual favours, or a degree in advanced maths. Be prepared to scream should he produce a slide rule.
Monday, May 07, 2012
Petticoat Tails

These come from the 1950 edition of the Betty Crocker Picture Cookbook. I flavoured mine with coconut, but really as it is pretty much a butter cookie, anything from vanilla to rosewater will do. The cookbook suggested wintergreen-I personally would not do that, but they're your biscuits, so do as you please.
You Will Need:
1 cup soft butter
1 cup sifted icing sugar
1 teaspoon extract
2 1/2 cups plain flour
1/4 teaspoon salt
Mix together butter, sugar, and flavouring with your hands. Work in the flour and salt (also by hand). Roll into a log about 2" in diameter. Wrap tightly in cling film. Chill overnight.
Preheat oven to 400 degrees F.
Slice 1/8 inch thick and place slightly apart on an ungreased baking sheet. Bake 8-10 minutes until lightly browned at the edges. Cool on racks.
Fig and Raisin Buttermilk Spice Cake With Butterscotch Sauce

This cake is deceptively light, so eat with caution. I baked mine in two 8 inch layer pans, and promptly froze one layer. You are of course free to bake it in a 9x13 pan, but I don't want to hear about it when you confess to demolishing most of it in a sitting.
I did not think the cake required a frosting, but it needed, something. I already had a jar of butterscotch sauce on hand, so I used it, but whipped cream, or a scoop of vanilla ice cream would be great too. If you must frost this cake (some people have different expectations when it comes to cake) a cream cheese frosting would probably be good, or a creamy white frosting. Much as I like penuche (and I really do love it) I think it would be a bit heavy for this light of a texture cake. Save that for your gingerbreads, or heavier spice cakes.
For The Cake:
3/4 cup dried figs, soaked an hour in boiling water and then drained and cut-up fine
1/4 cup plumped raisins
1/2 cup unsalted butter
1 1/2 cups granulated sugar
3 large eggs
2 cups plain flour
1 teaspoon baking powder
1 teaspoon bicarb.
2 teaspoons mixed spice
3/4 cup buttermilk
1/4 cup whole milk
Butter and flour two 8 inch round pans or 1 9x13. preheat oven to 350 degrees F.
Cream together the butter and sugar until light. Sift dry ingredients together. Set aside.
Beat eggs, one at a time into the creamed butter and sugar. Add dry ingredients alternating with milks. Fold in fruit at the end. Pour into pans and bake 25-30 for layers, about 40 for the sheet. Cake will pull from sides and have no crumbs clinging to a toothpick when done. Cool in pans on rack 15 minutes, then remove from pans and cool completely on rack. Serve with butterscotch sauce (recipe follows).
Butterscotch Sauce:
(From Best of Food and Wine, 1987)
1/2 cup unsalted butter
1 cup packed brown sugar
1/3 cup light corn syrup
1 1/2 cups heavy cream
1 tablespoon (not a typo) vanilla extract
1 teaspoon lemon juice, strained
Melt butter and brown sugar over medium heat. Stir in corn syrup. Whisk in the cream. Bring to a boil, then reduce heat and simmer, stirring occasionally until slightly thickened (it will thicken more upon cooling) 15-20 minutes. Remove from heat, whisk in the vanilla and lemon juice. Cool to room temperature, then chill. Store, tightly covered in the fridge. keeps several weeks.
My New Favourite Banana Bread
I've always used oil in banana bread as I was under the impression it improved storage time. This version is now over a week old, and is still fresh enough to enjoy for breakfast without toasting in the oven (you can do that with quick breads, you know. For god's sake, don't ever bin a quickbread unless it has gone mouldy-there's still plenty of life in it).
Danny has been going on (and on) over the texture of this bread, which is lighter than the typical banana loaf. I added extra baking powder, and made use of baking soda as well. The original recipe came from my newly acquired (Library Sale, Thursdays 10-3 and first Saturday of the month, Swanson branch, Omaha)copy of The American Heritage Cookbook. I made a few changes (omitted nuts, added chocolate chips, increased baking powder) but the use of butter and sour cream was new territory for me. I'm glad I didn't turn my nose up without trying it-the loaf is really delicious.
You Will Need:
1 1/2 cups plain flour
1/2 teaspoon bicarb
1 teaspoon baking powder
1/4 teaspoon salt (omit if using salted butter0
1 cup granulated sugar
2 large eggs
1 teaspoon vanilla extract
3/4 cup mashed, ripe bananas
2 tablespoons thick sour cream
1/2 cup mini chocolate chips plus more for the top of the loaf
Butter a loaf pan well. I use an over-sized Pullman loaf pan (without the top) as I like a long, shorter cake-but anything will work, just be sure to keep an eye on the time and test once in a while to see it doesn't over bake. preheat the oven to 350 degrees F.
Sift together the flour, bicarb, baking powder, and salt-set aside. Soften the butter, then beat in sugar a small bit at a time until smooth. Beat in eggs, one at a time. Add vanilla and bananas. Stir in flour mixture alternating with sour cream. Lastly, mix in chips, then pour into pan spreading to even. Scatter additional chips across the top of the loaf. Bake about 1 hour, or until cake tests done. Cool 15 minutes in pan, then remove to rack and cool completely. Banana bread keeps well tightly wrapped in wax paper and then an overlay of cling film. It is also better if permitted to rest at least 12 hours before serving. That may prove a challenge.
Sunday, May 06, 2012
The Worst Campaign Slogan...
...I've heard in a while.
Because anyone that went to school in the 70's is going to follow "forward" in their minds with, "Never straight." Dude.
Because anyone that went to school in the 70's is going to follow "forward" in their minds with, "Never straight." Dude.
Thursday, May 03, 2012
Beet and Cabbage Slaw With Horseradish
From the 1937 edition of The Herald Tribune Home Institute Cookbook
You Will Need:
2 cups vinegar (I used cider)
1 cup granulated sugar
2 teaspoons salt
1/2 teaspoon pepper
1/2 cup prepared horseradish
2 cups chopped, cooked beets(save to make a pickling syrup for onions and hard cooked eggs)
2 cups chopped, raw cabbage
Combine vinegar, sugar, and seasonings in a large pot. Boil 5 minutes. Add vegetables, mix well, and cook 5 minutes longer. Makes about 1 1/2 pints. I did not bother canning it as we're eating salads this week, but I would run it through a water bath canner for 20 minutes, were I to preserve it.
Wednesday, May 02, 2012
Angelica

I bought two angelica plants at the state arboretum sale last weekend. I hope they do well (supposedly they are perennial in our zone-but just barely) as I have great plans involving candied angelica come next Christmas (do you have any idea how expensive candied angelica is, assuming you can even find it?).
The leaves are also edible, and the plant has medicinal uses though I'm not really one to go experimenting with that sort of thing (because I know so little about it, not because I doubt the value of herbal remedies).
The garden is still thriving, and I made a beautiful jar of pickled radishes with a laurel leaf from my tree, and a freshly cut sprig of rosemary from the hedge. For all the misery living out here, I have to remind myself that the precious few months of the garden really does go quite a way with respect to quality of life.
Strawberry Coconut Key Lime Pie

I made this pie to use up key limes and strawberries, both of which I had in substantial amounts. I wasn't really sure what I'd end up with, but the pie turned out lovely. I made mine on the tart side, though citrus-hating son didn't have any difficulty ploughing through it, and rated it an 8 on a scale of 10 (I had no idea he had been rating my baking, but apparently that's what he's been up to, complete with records).
I could see this as small tarts as well, perhaps for a summer party.
For the crust:
1 1/3 cups sweetened coconut flakes
2 tablespoons melted butter
Combine and press into a 9 inch pie plate. Bake at 325 degrees F. until nicely browned-about 25 minutes. Cool before filling.
For the Strawberry/Key Lime Filling:
1/2 quart strawberries, crushed and forced through a sieve to total 1 1/4 cups juice
1/4 cup Key lime juice
1 cup granulated sugar
3 tablespoons cornstarch
Bring strawberry and lime juice to a boil. Slowly whisk in the sugar and cornstarch. Whisking constantly, bring to a boil cooking over medium heat. Boil 1 minute longer. Remove to a bowl, cover with wax paper directly on surface to prevent a skin forming. Cool, then chill completely before using to fill cold pie shell.
For the Whipped Cream:
1 cup heavy cream
1/2 cup icing sugar
1 1/2 teaspoons coconut extract
Beat cream until nearly stiff. beat in icing sugar. Beat in extract. Use to top pie.
Tuesday, May 01, 2012
Depression Era Banana Fritters
 Oooh, look at the beautiful salad greens from my garden.
From the moment I heard the words, "banana fritter", I was determined to make them. Before I got the chance, bananas skyrocketed in price, and as someone that could barely cope with the thought of paying .29 cents a pound, .89 cents per pound was out of the question. Danny never really liked them anyway, so I moved on to other fruit. Once in a while I'd get some that were slightly past their prime at a bargain, but those were destined for banana bread. Last weekend, I scored a large bunch for .25 cents. While I did make the obligatory loaf, I thought it time to attempt the fritters.
These are so easy, it is silly. Toss your bananas in some sort of juice to keep them from darkening (I used key lime because I have two pints of the stuff at the moment-the limes were also on sale for .50 cents a bag). Roll them in crushed corn flakes, and fry them in butter. That's it. I served them as a salad course.
Predictably, Danny didn't like them (as he doesn't care for bananas) and Mr. ETB did, as he likes anything that has been breaded and fried in butter.
I do think these would work better with less ripe bananas, or even plantains. Still, I'm glad I finally had the opportunity to make them-I lose sleep over this sort of thing.
Subscribe to:
Posts (Atom)