Monday, June 30, 2008

Bing Cherries


For each quart of cherries, add 1/2 cup of sugar. Cook with just enough water to make a syrup. Cook the cherries slowly until hot throughout. Pack cherries into heated quart jars adding boiling water if needed to cover the fruit. Leave 1/2 inch head space.Remove air bubbles, wipe clean and seal with heated lids. Process 20 minutes in a water bath canner. Let cool five minutes before removing and let sit 24 hours before testing for seals.

Spinach Galette


This was silly-easy. Silly! I had no idea what to make for dinner, but I had some odds and ends of cheese I wanted to use up. This was the result.

You Will Need:

For The Crust:

2 1/4 teaspoons instant yeast
2 cups water
1 tablespoon sugar
2 1/2 teaspoons salt
4-6 cups bread flour

In a large bowl, dissolve the yeast in the water and add the sugar and salt. Add the flour a cup at a time, beating well with a wooden spoon. When dough is stiff enough to handle, turn out on a board and knead, adding additional flour if needed. Knead until smooth-about ten minutes. Place in a well-oiled bowl. Turn once, cover and let rise until doubled-about an hour. Punch down, let rest five minutes before stretching and placing in an oiled pan.

Preheat the oven to 350 degrees F.


Make the filling while the dough rises:

2 packages frozen spinach-cooked, drained and squeezed dry in a kitchen towel.
2 cups 4 % cottage cheese, drained
3 eggs
3 cups grated Provolone cheese
1 cup grated Pecorino Romano
1 teaspoon dried minced garlic (it was all I had. Fresh would be better)
salt and pepper to taste
1/4 cup chopped parsley
About 8 sage leaves, chopped
1 teaspoon dried thyme
1/2 teaspoon dried chervil tossed over at the last minute before baking

Mix everything except chervil together.

Wash:
1 egg yolk 1 tablespoon water

Press dough into a large, deep oiled pan (I used large cake pans). Let extra dough overhang as it will be folded partly over. Fill galette with spinach mixture. Fold the edges of the dough over the spinach mixture leaving the centre exposed. Brush with egg wash. Dust centre lightly with chervil and bake in a 350 degree oven for about 30 minutes (you'll need to keep checking). Let stand five minutes before cutting. This makes a massive amount of food (leftovers, yay!).

Apricot Tart


This is only a sugar pastry crust fully baked and then filled with a layer of apricot preserves. I topped it with sliced, fresh apricots and a few raspberries. The glaze is made from melting down some preserves and putting it through a sieve. Then it is brushed over the tart and chilled.

Danny wanted an apricot pie, but at current prices, I couldn't imagine sacrificing a few pounds of apricots to a pie. Fortunately, he doesn't really comprehend the difference between a tart and pie. He loved his fancy apricot "pie" and so did his papa. There's very little left.

Apricot Jam


As promised, here is the recipe. I made a second batch today because the nice young man in the produce department ran in back to get me the fresh-off-the-truck apricots. I'll bet his mother does preserving-he seemed like he knew a bit about it and wanted me to have the nicest ones. They were really excellent apricots.

Standard Disclaimer:

Follow canning guidelines set forth by the USDA because I cannot be responsible for your stupidity and resulting food poisoning. Food safety is important-don't blow it off. Do a bit of reading before attempting any preserving-it will go smoother and it may save your life.


This recipe makes about 3 pints:

1 quart peeled, crushed apricots, stones removed.
3 1/2 cups sugar
1/4 cup fresh lemon juice

Place the apricots and lemon juice in a large, heavy pot. Gradulay add sugar over medium heat until dissolved. Cook slowly until it comes to a boil, then rapidly to gelling point.

Ladle into hot jars, remove air bubles and wipe clean. Seal with heated lid and screw on rim fingertip-tight (don't force it). Place in water bath canner and process 15 minutes. Remove lid, cut the heat and let cool in canner another five minutes. Cool on towels about 2 inches apart. Do not touch for 24 hours. Test for seals. Clean and store jars.

Sunday, June 29, 2008

Show And Tell

Apricot jamAn afternoon at Lauritzen Gardens with my camera-shy kid. He's probably just embarrassed to be seen with his mother wearing a "fruit cocktail" dress.
Jars simmering away waiting to be filled
Cherries in syrup to go in jars above
Strawberry jam

For once, my camera captured accurate colours with the jams. They really are that wonderfully bright.

Saturday, June 28, 2008

Still Preserving

Today was one of those awful, awful days where crap just kept happening and I couldn't do a damn thing about it. Actually, that's not entirely true-I dealt with things after the fact. I couldn't prevent them happening. The dog is sick (he's very, very old), we nearly forgot to pay our health insurance (frenzied drive to central post office on Saturday afternoon to overnight the payment) and on and on. There's still broken glass and boards and nails and assorted debris everywhere I look. The house is cleaned up, but we held off on cleaning the carpet until after the windows are replaced. I keep finding pieces of plaster and the tiny foam balls from the popcorn ceiling everywhere-there is some wedged into the keyboard as I type. I spend most of my time in the two rooms spared from the tornado-the kitchen and Danny's room.

So yesterday, when the 100 mph winds were tearing through here, I stood my ground in the kitchen and kept canning figuring if there isn't actual rotation spotted, I can't be bothered with it. This is probably stupid, but I'm going through severe weather burn-out. Sure, if the weather radio alarm said to take cover, I'd do it-but I refuse to go into a panic. OK, maybe I'll panic a little, but I'm not going to let it interrupt my life-particularly my canning. If I can just keep stuffing things in jars, everything will eventually go back to normal. If that doesn't work, at least we'll have blueberries in December.

Today, I made a batch of cherry preserves and apricot jam. I don't think there is a better smell on earth than apricots and sugar bubbling away atop the stove. I'll post photos tomorrow after the jars cool and I can wipe them clean. The colours are really striking. Until I made my own, I had no idea how bright strawberry jam could be. Likewise, I always thought apricots had a sort of dark, dull colour-until I saw my bright orange jam shimmering in the late afternoon light.

Given what's been happening here lately, this has been a great form of stress relief. There's something almost meditative about preparing the jars and lids, setting out materials, and preparing fruit. The time it takes to peel 8 lbs. of apricots is time spent watching the paring knife move across the fruit-instead of time wondering how long it will take to race to the central post office to send in a late bill. The time it takes to pit six pounds of cherries is time that isn't spent wondering how much longer our elderly poodle will be with us. For that couple hours all that matters is making sure I remember to get out the air bubbles and wipe the rims of the jars clean before sealing them. It is mechanical, automatic, assembly-line type work that a robot could do just as well, but a robot couldn't appreciate the beauty of 8 lbs. of perfect apricots.

If I can just keep preserving things, maybe I won't have to think too much.

Friday, June 27, 2008

Peach Cobbler

Easy does not necessarily mean good and this cobbler was not-good. Because I do not wish to hurt the feelings of the person that posted it, I won't link to the recipe, but take my word for it, yuck.

The idea is to brown a stick of butter, place it in the bottom of the pan, then pour on a batter that gets topped with fruit and brown sugar. Too sweet, bad texture, yuck again..

Admittedly, this may be my own preference for biscuit dough topping that gets dolloped on rather than this cake/pudding idea. No-after considering it further, it really isn't any good.

Oh well, you win some you lose some when trying recipes off the Internet. Have I mentioned how much I miss my cookbooks that were ruined in the tornado? By the way, we had 90 (not a typo) mph winds blowing through our county this afternoon. There wasn't any rotation so technically it was a tornado but dang if that wasn't stronger than some hurricanes I lived through back East. Have I mentioned how sick I am of this weather? Oh yeah, I guess I have.

Tomorrow I'm making apricot jam and the following day, cherry preserves. I have so much fruit in my house right now the kitchen looks like a farm stand. Too bad I had to waste peaches on this crappy cobbler.

Ick.

Fried Green Tomatoes


We love these so much we may never see any ripe tomatoes from our plants. I'm still sort of shocked that the plants survived the tornado (took out a barn and half the house, but the tomato plants are still standing).

Proportions are approximate-here's the method.

Slice tomatoes about 1/2 inch thick
in separate bowls place the following:
milk
2 beaten eggs
cornmeal tossed with salt and chili powder to taste
plain flour

First dip the tomatoes in milk, then plain flour. Then dip in egg, then in cornmeal. When all are coated, heat a pan with about an inch of oil over moderate heat. Fry the tomatoes in hot fat for about a minute each side or until nicely browned. Drain, eat with hot sauce.

Green And White Beans


This is a wonderful dish, whether served as a cold salad, or warmed over pasta. An hour's worth of work will make quite a bit and it actually improves after sitting for a day or so.


You Will Need:

4 cups cooked white beans
2-3 lbs. fresh green beans, trimmed
1 large tin of Roma tomatoes seeded and chopped, liquid reserved and enough water to make 3/4 cup liquid

2 cups thinly sliced onions
1/2 cup olive oil
salt and pepper to taste
3 cloves crushed garlic
the following tied in a cheesecloth:
3 whole cloves
1 bay leaf
3 sprigs parsley
1 teaspoon thyme

After cooking, add:
1 large bunch basil, chopped
a few fresh sage leaves
3-4 sprigs parsley, chopped


In a large pot of salted water, blanch the green beans for about ten minutes or until tender, but still crisp. Drain, and run under cold water to refresh and stop the cooking.

In a large pot, heat the olive oil and onions over medium heat and cook until soft but not browned-about ten minutes. Add the tomatoes, cheesecloth tied herbs, garlic, and liquid. Cover and cook 30 minutes over a slow simmer.

Add the green beans, cover again and cook another 8-10 minutes or until green beans are done. Add the white beans and toss gently. Add the chopped herbs and serve either hot over pasta or at room temperature as a salad.

Thursday, June 26, 2008

Red Plum Jam


I'm getting pretty good at this.

The jars look a bit cloudy because they went through a water-bath canner with our (very) hard water. No problem-once they cool, simply wipe the jars clean with vinegar.

The recipe made 11 1/2 pint jars. This particular recipe uses pectin-I might have a go at a traditional one before the season is over. This is another from Sure-Jell.


DISCLAIMER:
If you've never canned before, or only made freezer jam, please take some time to learn proper technique for canning. Check the website for your local extension office, or pick up a Ball Blue Book (that's where I learned). prior to the 1980's, books did not mention a water bath for jams and jellies. Today, you really must put them in a canner for ten minutes. This isn't an optional step and I take no responsibility for your stupidity should you chose to ignore this direction. Because I know people (bein' people) will be determined to do things their own sweet way, I'm only listing the recipe-not the technique...Because I want you to read-up on proper canning methods. Botulism is no party, and I won't be a party to it.

You Will Need:

4 lbs. plums (totalling 6 cups cooked plums (measure after cooking and before adding pectin)
1 box pectin
8 cups sugar

Chop the plums finely. Cook in a pot with 1/2 cup water bringing to a boil over high heat. Cover, reduce heat and simmer five minutes. Measure again to be sure you have six cups fruit and juice. Add pectin stirring over high heat until it comes to a rolling boil. Stir in sugar quickly and return to full rolling boil. Cook one minute longer. Remove from heat, pack into hot, sterilised jars, remove air bubles with a spatula, wipe tops and sides clean, seal fingertip-tight and process in a canner for ten minutes. This is an overview-you must follow an established canning procedure. Read-up first, it makes the whole thing easier. And buy a jar-lifter, it is money well spent.

Let stand, undisturbed for 24 hours. Check for seals (lids should not ping back when pressed) and store. Use opened jars within three weeks.

Wednesday, June 25, 2008

Rosemary Olive Oil Crackers


Finally, a recipe from a recent issue of Gourmet worth making. The recipe may be found HERE, though I skipped sprinkling it with additional rosemary (good call) and used Kosher salt instead of Maldon because...well, because people are eating out of garbage dumpsters and no one needs to spend that sort of money on salt. I really don't know how people do without feeling seriously embarrassed at their extravagance in the face of so much suffering. I know you could make that argument about many food items, but salt seems the most commodity fetishised these days.

And Maldon isn't even the high-end stuff.

I also wouldn't use expensive olive oil for this-the cheap stuff actually tastes better against the strong rosemary.


I could see making these again with less oil and perhaps different herbs. Salt and pepper might also work nicely. I'm serving them with soup tonight-because nothing goes with a 90 degree day like soup!

Tomatilla Salsa And Mint Syrup


It looks like a urine sample, I know-that's been pointed out.

Here are a couple of things I didn't feel like making, and no one feels like eating (we're under the weather). Still, what else is to be done with too much cilantro and mint? Hopefully, tomorrow we'll be in the mood for eggs with salsa and some mint lemonade.

For The Salsa:

4-6 large tomatillas (well, as large as they get, they're pretty small, generally)
1/2 white onion
1 large bunch cilantro/coriander stems removed
1 large clove garlic
Salt to taste
2-3 pickled Jalapenos peppers


Remove the paper skins from tomatillas. Wash and boil in a pot for ten minutes or so until they are very light in colour. Drain. In a blender, mix everything together being careful to let the hot steam escape. Cool, and store tightly covered in fridge.

For The Mint Syrup

1 cup sugar
2 cups water
1 large bunch mint, stems removed

Bring sugar and water to a boil. Add mint, reduce heat slightly and cook until reduced by half. Strain, pour into jars and cool. Store in fridge and use within a week.

Tuesday, June 24, 2008

Ginger/Plum Sorbet


Remember the wine and plum sorbet from last year? This is a non-alcoholic version with a very strong addition of ginger.

You Will Need:

1 lb. ripe plums-any type
1 1/2 cups water
3/4 cup sugar
1 cinnamon stick
1 tablespoon ginger, sliced
2 3 inch strips of lemon zest
8 peppercorns
Pinch of salt

Stir everything together in a large, heavy pot. Cook, covered over medium heat, stirring occasionally until plums fall apart-about 25 minutes. Puree in the blender a bit at a time until smooth. Strain through a fine sieve into a bowl. Cool, uncovered and then chill several hours or overnight before processing in an ice cream maker.

Garbanzo/Spinach Croquettes


What do you do when it is dinnertime and the only thing you have on hand are garbanzo beans and spinach? These ought to satisfy a hungry bunch. Not only did they fry-up light without the slightest hint of greasiness, they are economical as well (I used frozen spinach and I soaked and cooked my own garbanzos).

I served the croquettes with cous cous made with herbs and dried fruit. Thinking about it, I should have made use of some fresh mint (since I have it) but I don't think the recipe suffered any for the omission.

You Will Need:

4 cups cooked garbanzos, drained and as many skins removed as you can stand to deal with (it gets tedious)
1 1/2 cups fresh breadcrumbs
1 teaspoon salt
1/4 teaspoon pepper
1/2 onion, chopped
5-6 large sage leaves left whole
1 cup frozen spinach, cooked, drained and squeezed dry in a towel
1 egg
1/4-1/2 cup all purpose flour
1 tablespoon olive oil
Canola oil for frying

In a large bowl, mash the chickpeas. It is OK if some remain whole here and there. In a small pan, sauté the onion and sage in a small bit of olive oil until soft.

Add together in a bowl, the chickpeas, cooked onion, seasonings, spinach, egg and oil. Mix in the breadcrumbs. At this point, you need to add enough flour to make the consistency thick enough to form into balls. You may need more or less than the recipe calls for. What you don't want is too much flour as the croquettes should not be dry.

Heat a couple inches of canola oil in a deep frying pan until quite hot. Fry a few at a time, pressing down with a spatula to make them flatter. When browned, turn and cook the other side-about a minute each side. remove to rack over a baking sheet and drain well.

Serve immediately.

Monday, June 23, 2008

Mini Pear/Ginger Cream Tarts


Unfortunately, they don't look so pretty. Eh, whatever.

You Will Need:

Single crust pastry of your choice
1 large, ripe pear
1/4 cup melted and strained apricot preserves

Cream:

1/2 cup sugar
1/2 teaspoon ground ginger
1/4 teaspoon salt
2 tablespoons cornstarch
1 egg
2 cups milk
1 tablespoon butter
1 teaspoon vanilla

Mix everything but milk in a small saucepan. Add milk slowly and whisk, over medium heat until it comes to a boil. Cook 1 minute longer. Remove from heat, whisk in butter and vanilla. Transfer to a bowl, cover with plastic directly on surface and cool.

Blind bake the tart crusts at 425 degrees F. for about 25 minutes. Fill with chilled cream filling. Top with pear slices. brush with melted preserves.

Saturday, June 21, 2008

Strawberry Peach Ice Cream


A quick, simple recipe for in-season fruit.

You Will Need:

1 cup heavy cream
1 cup whole milk
3/4 cup sugar
2 peaches chopped
2 cups strawberries, crushed

Crush berries and peaches and mix with sugar. Let stand 20 minutes. Stir in milk and cream. Process in an ice cream maker until fluffy. Freeze until firm.

Josephine Jam


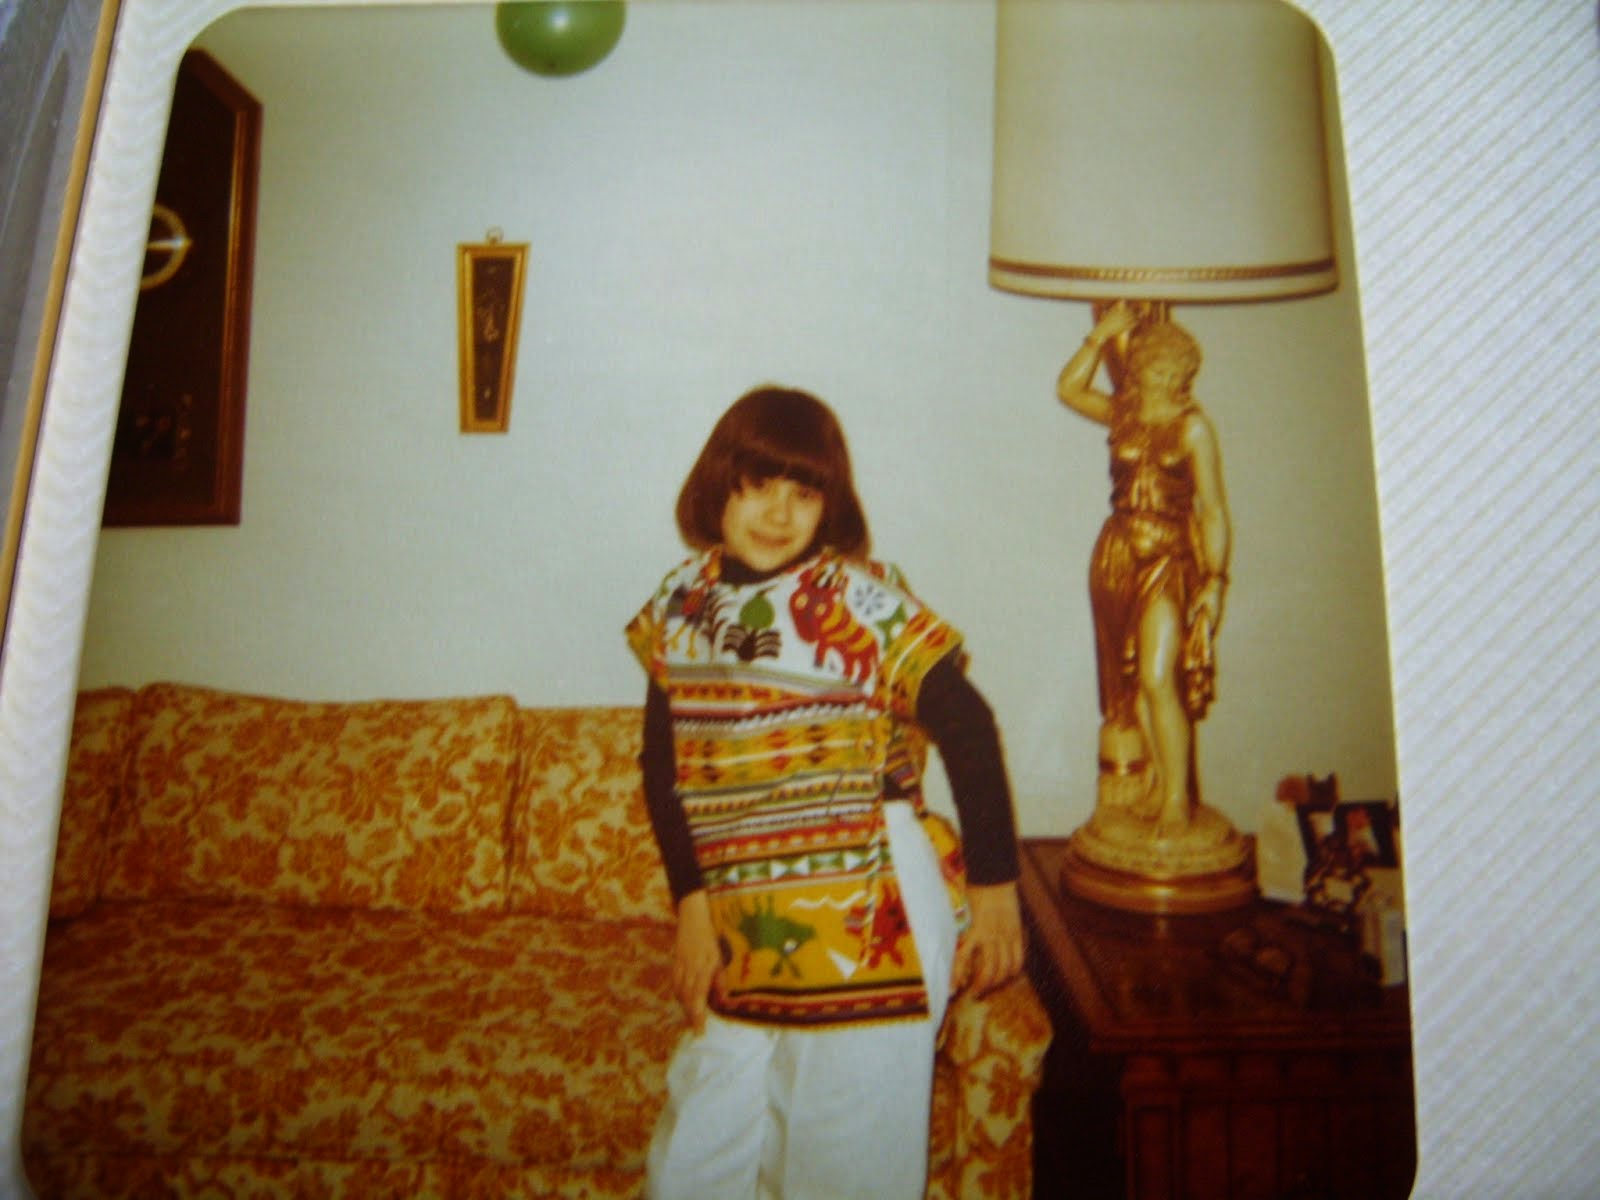
More years ago than I care to remember, I attended high school in what was then a somewhat small suburb of Chicago. In fact, it was so long ago that smoking was actually permitted on school grounds and no one was expelled for being in possession of Tylenol, or dental floss or any of the other zero-tolerance contraband of today. No, back in the stone age before Deerfield, Illinois had roads (n-stuff) about the only thing that would get you in trouble would be if the school security guard caught you red handed with dope. Even then, unless there was a substantial quantity, odds were the police would not be called.

Our school security guard was a fifty-something woman that weighed a good couple hundred pounds and worse dark tinted glasses so thick it was a wonder she could navigate her way down the halls without slamming herself into rows of lockers. She had a bouffant hairdo and a uniform that consisted of pull-on polyester pants, a white blouse and a matching dark blue long-shirtwaist with pockets. Her name was Josephine and everyone knew she wouldn't be chasing after anyone unless she really had to. It was a long walk from the smoking area at the rear of the school to the office, so simply reeking in dope would have been a waste of her energy. It also just wasn't that big of a deal at that time. Today? Oh god, you'd probably have a felony conviction the way things are going and have the rest of your life ruined-but back then, the biggest fear most tea-head teenagers had was their parents being called in to school. No one feared the school security guard.

Still, teenagers being teenagers, we'd devised ways to alert others to Josephine approaching: We'd yell, "Blueberry!"

I'm sure she knew it. Come on, how could she not know it? This alert system would be employed whether anything illegal was actually taking place-as a sort of general heads-up. Through the course of a typical day, it would not have been uncommon to hear "Blueberry" shouted numerous times.

I'm positive she knew it. The thing is, Josephine was a really nice woman. She wasn't on some power-trip, and it wasn't her idea of sport to see how many kids she could get in trouble. She punched the clock and tried not to make anyone's life too miserable. I suppose had there ever been a real emergency she wouldn't have been able to do much as she wasn't armed. Josephine was there to be some sort of authority figure, but we didn't really fear her-we also didn't hate her. I actually respected her for being a decent human being. I wonder how many "resource officers" in schools today get that sort of a warm feeling from the students? You know, the old thing about being respected by treating people with respect. What do you know, it's true. She didn't turn high school into a game of "gotcha" for some trivial infraction, and didn't bother with senseless punitive punishments for failing to "respect her authori-tay" That's probably why I'm still calling blueberries "Josephine Berries" all these years later. And I didn't grow up to be a dope fiend, or hold up liquor stores at gunpoint, or turn into a pumpkin at the stroke of midnight. Amazing, I know. I grew up to be a middle aged woman putting-up preserves in a farmhouse.

It is with great admiration for a woman who did a job you couldn't possibly pay me enough to do that I offer this recipe for Josephine Freezer Jam:
(Recipe from Sure-Jell fruit Pectin)

You Will Need:

7 1/2 pint jars, lids and bands suitable for freezing
2 1/2 pints blueberries (3 cups crushed)
5 1/4 cups sugar
1 box pectin
3/4 cup water

Wash jars, lids and bands in soapy hot water. Dry.

Crush blueberries in a large bowl. Cover with sugar and stir well. Let stand ten minutes, stirring occasionally. In a saucepan, heat the water and pectin over high heat until it comes to a boil. Cook 1 minute longer. Stir pectin into fruit and sugar. Keep stirring for three minutes. Ladle into jars (a wide-mouthed funnel is a great help). Wipe tops clean and seal. Let stand undisturbed at room temperature for 24 hours. Then refrigerate and use within three weeks, or freeze for longer storage.

Bread Salad With Fried Eggplant


Sort of hard to tell the bread from the eggplant as they are similar in colour. What the salad lacks in colour, it makes up for in flavour.I'm calling it a salad, but a quick look at the ingredients ought to indicate this isn't health food.

I had half a loaf of bread going stale and a very inexpensive eggplant waiting to be used. Add to that some fresh parsley, half a jar of marinated red peppers and some olives and it was a hearty meal made essentially from leftovers. I like saving money. Yes, I do.

This is best eaten the day it is made, but it will make it from lunch to dinner without any problem. I'm offering a recipe of sorts, but when it comes to the marinade and what vegetables and cheeses to add, you really can adjust it to your tastes. Hate balsamic vinegar? Use red wine vinegar. You get the idea.

You Will Need:

4 cups stale bread cut into cubes and dried hard(This can be done overnight on a baking sheet or in the oven at 200 degrees for 20 minutes or so. You want the bread really stale so that it will not turn mushy in the oil).
1 eggplant, sliced, salted, drained, breaded and fried
10 olives (I used a mix of green and black)
1/4 cup roasted red peppers
1/2 large red onion, thinly sliced
1 large bunch parsley leaves, stems removed and leaves chopped
1 teaspoon dried thyme
1/2 cup Provolone cheese cut into cubes
olive oil/Balsamic vinegar for marinade(I used 1/4 cup oil and 3 tablespoons vinegar, but you can adjust that)
Salt and pepper to taste

Toss it together and let sit about ten minutes for the bread to soak up oil. Serve at room temperature.

Friday, June 20, 2008

Someday, He'll Remember This Fondly, I Hope

I needed to go into downtown Lincoln today-something I almost never do. Since the capitol was nearby, it seemed like a good idea to let Danny see it. Built in the 1920's and completed in 1930, the Nebraska State capitol building is a real Art Deco treasure. The building is filled with glorious mosaics and iron work with scenes from nature and mythology. It must have seemed insane at the time to construct such a thing, but it is really a marvel.

Standing a few streets over, waiting for a light to change we found ourselves amid a group of downtown employees taking a smoke break. I pointed over to the dome of the capitol.

"Hey Danny, do you see that guy at the top of the capitol building?"
(Danny nods)
"That's the Sower. It's his building. He has a bag of corn seed slung over his shoulder and when you get closer to the building you have to really run as fast as you can because there's nothing that Sower likes more than pelting kids on the head with corn."
(Snickers from the smoking office workers)
"I mean it, you really need to run."
(Conspiratorial nods from smoking office workers)

-a couple blocks later...

"Mama, why does he throw corn?"
"Because he's a Sower. That's just what Sowers do."
"But why does he hit people on the head with it?"
"Oh, I guess because it's fun."
"That isn't fun."
"It is if you're the Sower."

-nearing the Capitol building...

"OK Danny, run, run run!"

-Runs up steps to door...

"Did he get you? (checking him for injuries)
"No. Did he get you?"
"No. Maybe he knew we were from Saunders county. He doesn't throw as hard at people from rural areas."
"Mama, does he really throw corn?"
"Absolutely. There's a woman at the information desk you can ask if you don't believe me."

He was too shy to ask the woman at the information desk if the Sower pelts people on the head with corn, but I could tell he wanted to.

Next time we visit, I need to pack some popcorn kernels in my purse for effect.

Thursday, June 19, 2008

3 1/2


I asked Danny what sort of a cake he wanted for his half-birthday (with the intention of baking a cake and cutting it in half) but he surprised me by requesting the same cake he had for his third birthday. That seemed kind of boring, so after a bit of questioning I was able to discern he really just wanted tractor cookies again. Good thing I saved the template. I figured, after all the chaos the past few weeks it would be a nice break.

The barn is made by dividing a two layer cake recipe between an 8x8x2 square pan, and a loaf pan. The 8x8x2 is cut in half and layered with frosting. The loaf cake is inverted and then trimmed at an angle down the sides to make the roof. The silos were made by stacking sandwich cookies (I made the chocolate malt cookies) together with frosting. The roof is Chex cereal.

I broke the project up over two days and I'm really glad I did. I won't lie and say, "Oh, it was simple to do", because no matter how carefully you plan, there's always the matter of sliding silos or cakes that do not cut cleanly and well-frosting hides quite a bit, you know?

In the coming weeks I'm going to start a "cook your way through a book" project...except it isn't a cookbook. Much like the Home Baking With Counterpunch project, I'm probably the only person outside of a few Classicists that will find it amusing, but what the heck. Life's too short not to enjoy your time in the kitchen.

Danny's half-birthday is actually tomorrow, but I have a busy day planned so I'm posting the photo now.

Wednesday, June 18, 2008

Blueberry/Pear Chutney

I'm sorry that I didn't take a photograph while the light was still good because this chutney had the most beautiful purple colour. Don't let the absence of a photo keep you from trying this wonderful chutney while fresh blueberries are in season.

You Will Need:

1 cup fresh blueberries
2 ripe pears, peeled and chopped
1 cup raisins
1 cup sultanas
1/4 cup crystalised ginger, chopped
2 large sprigs fresh rose4mary
1/4 cup cider vinegar
1/2 teaspoon salt
1/2 cup packed brown sugar
2 garlic cloves, chopped
1 large red onion, chopped

Usually I add water to chutney when using dried fruit, but with all the fresh fruit in here, it isn't needed.

Toss it all in a pot and bring to a boil. Reduce heat to medium and cook, stirring occasionally until most of the liquid has evaporated (about 20 minutes). You do want to keep some liquid for packing, so don't feel it must cook down entirely.

Cool, pack into jars and use within a week. Makes 1 1/2 pints.

Tuesday, June 17, 2008

A Return To Normalcy


-Sort of.

I got the kitchen put back together and spotless (thankfully, we didn't lose windows on that end of the house) and made some jam. I needed to. Since I wait all year (through long, long Nebraska winters) for the first beautiful June berries, I wasn't about to let a tornado deprive me of them. Actually, the tornado did sort of deprive me of the June berries because it took out my patch-or the hail did. These berries were store-bought, but lovely anyway. Usually the pheasants get the berries before we do-they must be kind of bumming. Maybe I should leave some out for them?

We're getting things back together slowly. I washed, ironed and put up my curtains today-over the plywood boards. I was just so sick of looking at that wood. It actually did brighten things up in here a bit. Maybe I should just get out some paints and do scenery-it's not like the neighbours don't already think I'm out of my mind hanging curtains over plywood boards.

As soon as my cookbooks dry out, I can try the more challenging preserves. I had one for cantaloupe with black pepper I was interested in trying.

I also made a very intense ginger/plum sorbet today. I'll try to get photos and a recipe up tomorrow when the light is better (or at least as much daylight as a semi-boarded up house gets).

Thanks again for everyone's kind thoughts. We're getting things straightened out. If anyone has a car they don't need, I'd be interested as mine was totaled.

Monday, June 16, 2008

Meatless Bean Burgers


These were fun, and so much less expensive than the frozen kind. I made a large batch of beans yesterday and had just enough left over. This recipe is flexible, and you can play with the amount of beans and onions to taste. I haven't tried it, but small diced carrots, sauteed lightly might also work. The burgers are quick to make, and will probably be done long before any side dishes, so plan accordingly. I topped these with a slice of Swiss cheese. The original recipe I adapted this from suggested things like seasoned salt, onion powder, and other items I don't keep in my larder. The proportions seemed all wrong as well. After you've been cooking a while you'll be able to tell at a glance if something will work or not (usually-sometimes I still get fooled) and I didn't have much confidence in the original. That's why I'm not linking to it-not because I'm unwilling to give credit where credit is due.

Because the burgers are so 'bready", You'll probably want to use a lighter bread than I did-or none at all.

You Will Need:

1/2 onion, finely diced
2 1/2 cups cooked black beans (red would work OK too)
1/2 cup flour (plus more if needed)
2 slices bread crumbled( I used leftover chocolate bread which worked great with the black bean/chili thing)
1 teaspoon garlic powder
1/2 teaspoon Ancho chili powder
Salt and pepper to taste
Oil for shallow frying

Cook the onion in a bit of oil until soft. Mix with everything else, adding the flour gradually. You may not need all of it, or you may need more depending on the moisture in your beans. The mixture should be thick enough to form into patties.

Over medium heat, heat a couple tablespoons of cooking oil and fry until nicely browned on each side. Serve hot. Makes 8 medium sized burgers.

Sunday, June 15, 2008

Flourless Chocolate Cake


A nice, easy cake that does not require much energy to prepare (which is good, because I don't have any left). Not overly sweet, but quite chocolate, it is a cake that can be ready in under an hour.

You Will Need:

4 ounces chopped bittersweet chocolate
1/2 cup unsalted butter
3/4 cup sugar
3 large eggs
1/2 cup unsweetened cocoa powder and extra for topping

Preheat oven to 375 degrees F.

Grease an 8 inch round pan and line the bottom with parchment. Grease the parchment as well.

In a heavy bottomed pan (or if you're not skilled with melting chocolate, a double boiler) melt the bittersweet chocolate with the butter stirring until smooth. Remove from heat. Whisk in sugar. Add eggs and whisk well. Sift in the cocoa powder and whisk until just mixed. Pour into pan and bake 25 minutes on the middle rack or until a crust forms on top. Cool in pan fifteen minutes, then unmould on plate. Dust with extra cocoa.

Father's Day Blintzes


Or crepes, whatever you prefer to call them. The only distinction I can find is that blintzes are fried again after being filled.

I didn't really plan for Father's Day, disrupted as we were with the tornado. I realised this at four in the morning, so I dragged my arse out of bed and started looking around the blogs (because my precious cookbook collection is currently drying out in boxes filled with kitty litter) and wouldn't you know it, Jenn at Chocolate Shavings came to my rescue-again. Remember the pots de creme for Mr. Eat The Blog's birthday? I can honestly say, she's never failed me with a bad recipe (and I've made quite a few of them). This recipe is about as foolproof as can be.

I didn't want to do chocolate (as I'd just made chocolate bread) so I improvised a cottage cheese/raisin filling that was pretty darn close to what I remember as a child in Chicago. I added orange zest, but I think lemon or cinnamon would be great as well.

For the crepes recipe go HERE.

For the filling:

1 1/2 cups cottage cheese, drained
2 tablespoons sour cream
1 tablespoon sugar
1 teaspoon grated orange zest
4 tablespoons raisins

Mix well and use to fill blintzes.

Make the blintzes one at a time and set aside on a plate. Then, when they are completed, fry in a large pan with a generous amount of butter until well browned on the outside.

Serve immediately, or freeze extra between sheets of waxed paper.

Chocolate Buttermilk Bread


Well, I'm back-sort of. I can't say I'm feeling terribly inspired and after losing the contents of both the fridge and freezer, I don't have a stocked kitchen to turn to . I tried making a replacement list, but you know that won't work. I'll remember what I need when I go to use it.

The sourdough starter bit the dust. I'm not sure at this point if I will do another.

This recipe was the result of a cup of buttermilk waiting to be used-up. Well, that and wanting some chocolate. I used a cup of buttermilk and a cup of whole milk. I don't see any reason the entire thing couldn't be made with buttermilk (or sour cream for that matter).

The chocolate was store-brand bittersweet chips that cost a buck a bag (and were made of real chocolate!). You could use semi-sweet chips but I would stay away from milk chocolate as it would probably be too sweet and too soft.

I tried a slice a few minutes ago and as soon as I finish this post, I'm off for more. I can't wait to try this toasted with some butter or cream cheese.

You Will Need:

1 cup buttermilk
1 cup whole milk
5 tablespoons butter
1 tablespoon sugar
2 teaspoons salt
2 1/4 teaspoons granulated dry yeast (not instant)
1/4 cup warm water
8 teaspoons vital wheat gluten
5-6 cups bread flour
3/4 cup bittersweet chocolate chips
1 tablespoon cream and 1 egg yolk for glaze

Proof the yeast in the water in a small bowl and set aside. Heat the buttermilk and whole milk-just slightly until it steams. If you go too long it will start to curdle, which is OK if it does, but try to keep it from getting too warm. In a large bowl, place the butter, sugar and salt. Pour the warm milk over them and let sit until cooled to lukewarm. Stir in the yeast. Add three cups of the flour and mix well. Add the vital wheat gluten. Continue adding flour until dough is still somewhat wet and tacky but not super-sticky. knead in the chocolate. It does not matter if it begins melting as that helps create the lovely swirling effect.

Place in a buttered bowl, coat and cover. Let rise 1 1/2-2 hours or until doubled. Punch down, and let rest 30 minutes.

Divide dough, shape and place in well-buttered pans. Cover lightly and let rise until almost doubled-about 45 minutes.

Preheat the oven to 400 degrees F.

Bake loaves for twenty minutes. then rotate pans and bake another ten. Check for doneness (I baked mine to an internal temperature of 200 degrees F.) by tapping the bottom of the loaf or using a thermometer. Cool on racks.

Wednesday, June 11, 2008

Tornado Photos

Ceiling where the plaster and adhesive melted and ruined everything it touched.
View from side yard
My dining room table.
At least he finished the ice cream before the storm hit. Amazingly, the dish, nor my depression glass bowl broke. Tornadoes are funny, huh?
Large tree uprooted from the ground. I think I heard that falling when I was in the storm cellar, but had no idea what it was until the next morning.


I'll keep the post short as I still have a ton of work cleaning up and there isn't really much to say. Our town was hit by two tornadoes within minutes of each other. Everyone (in the entire town) is safe and in one piece. A few nights later, West Omaha was hit. We're under another tornado watch this evening. We only got power back yesterday (and water, as the well is electric) so I'm really just trying to carve out a living space in all this destruction.

More stories later as I have a chance to process all of this. Scroll down to see more photos.

More Tornado Photos

From the back door
From the front porch
Neighbour's barn in the yard
Collapsed garage and lawn
Front porch early morning after storm


Scroll up and down to view more.

More Tornado Photos

My desk.
Dining room windows blown out.
More hail damage
Brand new siding with hail damage.


Scroll up and down to view more.

More Tornado Photos

Boarded-up
Guess the lawn isn't getting mowed any time soon.
The white door in the floor leads to the storm cellar where we sat listening to glass crashing above.
Part of the neighbour's barn hanging from a tree in my yard.
Would you believe that sweater on the chair came clean? It did!


Scroll up and down to view more.