Tuesday, September 30, 2008

Tzimmes


Kids really seem to like this dish, probably owing to the sweetness. The recipe also works well with sweet potatoes. Some people do both, but I'd pre-cook the potatoes a bit in boiling water to adjust for differences in cooking time if you try it.

You Will Need:

Juice of four oranges
1 tablespoon honey
3 tablespoons butter, cut in pieces
8 carrots, thickly sliced in rounds
5-6 prunes, stones removed
2 large pieces of crystalised ginger, roughly chopped
1/2 teaspoon salt

Preheat oven to 375 degrees F.

Toss everything in a baking dish, cover and bake 30 minutes. Remove cover and baste with juice. Cook another thirty minutes or so (until most of the liquid is absorbed and carrots are soft)basting every ten minutes. Serve warm.

Apricot/Nectarine Noodle Kugel


Usually I make this with apricots but I had sliced nectarines in the freezer-so in they went. Danny didn't know the difference and he happily shoveled forkful after forkful into his mouth without pause. This is another thing I don't make often (because it has a million calories) so it tends to go quickly when I do. Kugel is great hot or cold.

You Will Need:

1 1/2 cups dry broad noodles, cooked and drained
2 eggs
1 tablespoon melted butter
1/4 teaspoon salt
1 cup cottage cheese (go ahead and use the 4 % milkfat or it will be dry)
1/2 cup sour cream (use the real stuff or it will be watery)
1/4 cup grated cheddar cheese
1/2 cup sultanas
8 fresh or tinned apricots or nectarines (peaches work great too) chopped
1/2 teaspoon cinnamon
1/2 cup sugar

Preheat oven to 375 degrees F. Grease a casserole dish

Cook and drain noodles. Combine with everything else and pour into dish. Bake about 40 minutes or until top is browned and most of the liquid has solidified. Serve warm or cold.

Baked Lima Bean Mash

This recipe came from a vegetarian cookbook that was trying to make mock gefilte fish. If that's what you're aiming for-this isn't going to be satisfying. I ended up changing it quite a bit because I lacked some special ingredients and then absent mindedly forgot to add the eggs. That was a happy mistake, as it turned it into a nice side dish. It can be eaten hot or cold, though my feeling is that it tastes better hot. On the other hand, it firms up nicely when cold and can be cut into squares for easy lunch box transport. I'm really glad I spaced out the eggs, and I will probably make this again. You can see another mashed lima bean dish I've made HERE though this is made from dried, white lima beans.

Of course, I forgot to take a photo because I'm distracted (obviously-I forgot to add two eggs).

You Will Need:

1 1/2 cups dried lima beans (or butter) soaked overnight
1 bay leaf
1 small bunch parsley
2 cloves garlic, one sliced one chopped
1 large onion, chopped
1/4 cup butter
3 tablespoons cooking oil
1 small green pepper, chopped finely
1/3 cup vegetable stock
Salt and pepper to taste
2 tablespoons lemon juice
1 1/2 tablespoons butter

Rinse the soaked beans and then place them in a large pot. Cover with water and boil rapidly for ten minutes. Drain off water, add fresh and return to a boil. Add the parsley, carrot, sliced garlic and bay leaf. bring to a boil and then reduce to simmer. Cook partially covered until very soft.

Drain the beans discarding bay leaf and parsley but keeping garlic and carrot. Cook the onion in 1/4 cup butter and vegetable oil for a few minutes until softened. Add chopped garlic and green pepper and cook until quite soft-about ten to fifteen minutes.

Preheat oven to 350 degrees F. Add the beans and carrot to the onion/pepper mix and mash well. Adjust seasonings. Pour into a well-oiled baking dish and dot with extra butter. Combine lemon juice with stock and pour over casserole. Bake in a pre-heated oven 30-45 minutes or until top begins to brown. The inside will be soft and fluffy.

Serve hot or cold.

Monday, September 29, 2008

Apple Cranberry Raisin Strudel


I had no idea if these would even work as I prepared them without a recipe using only what I had on hand. They worked all right-boy are these good.

I has clarified butter leftover from last night's curry, and half a box of dried cranberries I bought on sale for a buck at Walgreens. They weren't the nicest cranberries for eating out of hand, but plumped and baked they improved in texture and provided a nice tartness against the sweetness of the apples and raisins.

I had my doubts about the breadcrumbs, but I was determined to use the last bit of my sweet potato bread. That actually worked perfectly-better than any white bread crumbs I've used before.

Makes 2 strudels

You Will Need:

10 sheets Phyllo dough, thawed (1/2 package)
4-5 large golden delicious apples, peeled cored and sliced
water treated with lemon juice in a large bowl to keep apples white
1/4 cup raisins, soaked and drained
1/4 cup dried cranberries, soaked and drained
1 1/2 cups fresh breadcrumbs
1/2 cup clarified butter, melted
1/2 cup sugar
1/2 teaspoon cinnamon or ginger

Preheat oven to 350 degrees F. Grease a large baking sheet.

Prepare the apples and let stand in water until ready to bake. Then drain and mix with sugar, cinnamon and drained fruits.

On a towel or flexible cutting board, lay out Phyllo dough one at a time keeping remaining sheets covered. Brush lightly with butter-repeat until you have layered five sheets. Spread with half the breadcrumbs. In the bottom 1/4 of the square, spread the filling in a line leaving a bit of space at the edges. Lifting the edge of the towel or board, flip over, butter again and repeat until you have rolled it up. Make four slashes and place on baking sheet. Repeat with second strudel.

You will need to baste with the remaining butter at least twice in the process of baking. The strudels take about 40 minutes, so keep an eye on them. Remove to a rack to cool and then dust with powdered sugar before serving.

Bad, Bad Monkey!


Seems Curious George was a bit curious about that bottle of Mogen David wine and he polished off half of it! Now, he's ready to dig in for a slice of raisin challah. I'd better go tell that monkey to scram, but let me quickly extend my best for a healthy and happy new year. Just what I need-a tipsy monkey!

"Mama come quick, George is eating the noodle kugel..."

Friday, September 26, 2008

Off To Look For Apples

I'm going to disconnect from "the internets" for a while before I lose whatever faith I have left in humanity. I understand that the people who leave comments at the end of stories in the newspaper are a vocal minority that feel free to say things behind a keyboard they would never say in person...however, I can't look at it anymore. Once in a while it's good to disconnect.

Instead, I'm going to look for a nearby orchard to take Danny apple picking. This weekend is (I think) the last farmer's market in Omaha so I'll try to get up there tomorrow as well. Maybe a trip to Council Bluffs to the Union Pacific Railroad Museum to play with the train simulator ("Look mama, I'm driving the train!") which is the most fun a three year old can have that doesn't involve eating ice cream for breakfast.

I'm sure we'll do something fun, and at least I won't have to read all the self-righteous, finger-pointing-moralising-know-it-alls opining gleefully at the misery of others. Really people, there but for the grace of God-ya know?

Now, to find a good orchard. I know there are a few locals that read the blog-any suggestions in Saunders County?

Wednesday, September 24, 2008

Excavator Cake-Updated


Update:

As predicted, it was a real pain and the Twinkie squished apart. I tossed it and frosted a piece of pound cake instead. Also, shoving a stick through a twizzler is much more difficult than I anticipated, as they were already kind of moulded together in the bag. I'm glad I made my own cake and frosting as this would have been a frustrating effort with store bought frosting.
Verdict? Totally not worth the effort-and now I'm stuck with a box of icky doughnuts, a bag of twizzlers that smell like Silly Putty and let's not even discuss the gumdrops which I promptly tossed in the dustbin.

A while back, my mother-in-law clipped THIS article from the newspaper and sent it to me. The cake is awfully cut, and she thought I might like to make it for Danny. Last weekend at the grocer, I started to purchase some of the odd ingredients (Click the slide show to see a picture of the finished cake).

The thing is, I'm not paying four dollars for a bag of Oreo cookies that no one will like. What's more, I'm not going to buy a frozen pound cake either-even if they claim it is "all butter." I caved and bought the two-pack of Twinkies (for $1.09! Good heavens, shouldn't junk food actually be cheap?) and some off-brand fake chocolate covered mini-doughnuts and the Twizzlers and such. I skipped the frosting in a can because...well, I just couldn't do it. Maybe if it were inexpensive-but it isn't. Had I bought all the pre-made items needed to make this cake it would have been forty dollars at least. Apparently they no longer make small packages of candy and you're forced to purchase massive amounts of gumdrops.

I'll probably bake the pound cake today, and some dark chocolate wafer cookies as well (to be the dirt). I'm envisioning a frustrating mess trying to spread frosting on a squishy Twinkie, and I wonder if I ought to take them out of the package and let them dry out a bit first (I doubt very much anyone will want to eat them). Do Twinkies ever dry out, or are they so pumped full of preservatives they can survive forever? I wonder if freezing would help?

My experience with "quick" projects like these from magazines and newspapers that use all pre-baked items is that they are almost always more work than anticipated. If you hear screaming and a few select vulgarities, it's probably me trying to keep the doughnuts and front loader from sliding off the cake.

I'll let you know how it goes.

Tuesday, September 23, 2008

Spice Cake


I adapted this from the old recipe in the Betty Crocker cookbook. The thought of an entire cup of full-flavour molasses was a bit much for me today (though I do ordinarily love molasses). I substituted mild molasses and golden syrup instead and it really came out wonderful. I also omitted the cinnamon and flavoured it with ginger and a generous amount of ground cloves. Served with the homemade applesauce it was one of the best desserts I've brought to the table in some time.

Golden syrup isn't available everywhere in the US and often it is priced at a premium. You can substitute equal parts of molasses and corn syrup, or even try using rice syrup for a different flavour. Cane syrup is another option (often found in Caribbean markets). I can't attest to sorghum, but I'd be willing to try it if I could get my hands on some syrup. Really, any of these would work though personally, I wouldn't use black treacle or blackstrap molasses as they are both a bit too strong for anything save medicinal purposes.

if you do get your hands on golden syrup, it makes a lovely topping for oatmeal, and diluted with some water, a beautiful glaze for the tops of home-baked bread.


You Will Need:

1/2 cup unsalted butter
2 tablespoons sugar
1 egg
1/2 cup mild molasses
1/2 cup golden syrup
1 cup boiling water
2 1/4 cups all purpose flour
1 teaspoon baking soda
1/2 teaspoon salt
1 teaspoon ginger
1/2 teaspoon ground cloves

Butter and flour a 9 inch square pan.

preheat oven to 325 degrees F.

In a large bowl, mix together the butter, sugar and egg until well-blended. Add the molasses, golden syrup and boiling water. Mix well. Sift together the dry ingredients and add to the liquid batter. Mix until smooth (but don't over beat). Pour into prepared pan and bake 45-50 minutes. Serve hot or cold.

Pomegranate Ginger Fizz


You'll need to make a batch of ginger/pomegranate syrup but that's no big effort and you can use it diluted with water and ice for a refreshing drink alone.

You Will Need:

3 tablespoons Ginger/pomegranate syrup (directions below)
Juice of 3 Cara Cara oranges
1/4 cup ginger ale
Ice
Garnish of fruit on skewers

To Make Syrup:

1 pomegranate
1/2 cup water
1/2 cup sugar
generous slice ginger (peeled)
3 blueberries for colour


In a small pan, bring the sugar and water to a boil over high heat whisking constantly. Lower heat to medium and add fruit. Cook, mashing occasionally with a potato masher until syrup begins to thicken and coat the back of a spoon. Strain through a fine mesh sieve. If syrup is not as thick as you'd like it can be returned to pan and reduced further-otherwise, pour into a jar and cool before setting in the fridge. Keeps about 1 week.

Sweet Potato Bread


I adapted this from the recipe for rolls in Beard On Bread. Among the changes I made, I substituted bread flour and used quite a bit more than he calls for in the recipe. It isn't quite as light as Beard's original recipe which is fine as I wanted a hearty sandwich loaf.

This stuff makes the best grilled cheese sandwiches on earth. I'm serious. Cheddar cheese melted on a couple slices of this with butter-oh boy, is that ever good.

I've made this bread with butternut squash (a frozen block of it, at that) and it worked equally well.

You Will Need:

4 1/2 teaspoons granulated yeast
4 tablespoons granulated sugar
1/2 cup warm water
3 tablespoons melted butter, cooled
1 tablespoon salt
3 eggs (1 reserved for glaze)
3-4 cups bread flour (I ended up using close to five)
1/2 cup mashed sweet potato
2 tablespoons cream

Combine the yeast with 1 tablespoon of the sugar and sprinkle on the water. Stir to dissolve and let proof five minutes. Transfer to a large mixing bowl and add remaining sugar, butter, eggs and salt. Add three cups of the flour one cup at a time beating well after each addition. Mix in the mashed sweet potatoes. Add enough flour until you have a dough that is workable and no longer sticky. Knead a few minutes and place in a buttered bowl. Turn to coat, cover with plastic wrap and let rise 1-2 hours or until doubled.

Punch dough down and let rest a few minutes. Butter two loaf pans. Divide the dough, shape into loaves and place in pans. Let rise until almost doubled-about 1 hour.

Preheat oven to 375 degrees F.

Brush tops of loaves with cream and reserved egg beaten together. Bake 30-40 minutes or until dark and an instant read thermometer reads around 190 degrees F. Or bread sounds hollow when rapped. Cool on racks.

Chunky Applesauce


The only problem with this applesauce is that it is so good, you'll never want the stuff from a jar again. The recipe is from my 1950 edition of The Betty Crocker Picture Cookbook. Grab your favourite Bozo spoon and dig in1

You Will Need:

2 quarts sliced apples (I used Mac's because they cook quickly and have a good flavour)
2 cups water
1 teaspoon lemon juice
1/8 teaspoon grated lemon zest
1 cup sugar
1/2 teaspoon ground nutmeg
Pinch of salt


Cook the apples in the water at a simmer until they fall apart (you can help them along with a potato masher). Add everything else, stir and cook a few minutes longer until it thickens. Remove from heat. Cool a bit before transferring to fridge to cool.

Monday, September 22, 2008

Another Kulebiaka-Sort Of


I say "sort-of" because it is filled with carrots, mushrooms and kasha instead of salmon and rice. I've made this before and you can see prettier efforts HERE. This time, I made two instead of a single large pastry as it is easier to manage the leftovers.

I won't lie-this is a huge pain to prepare. Like most things, it can be done in stages which makes it somewhat more manageable, but there is a reason I don't make it very often.

You Will Need:

For The Pastry:

4 cups all purpose flour
1/2 pound unsalted butter cut into small pieces
2 tablespoons chilled vegetable shortening
1 teaspoon salt
12 tablespoons ice water, plus 4-5 more if needed
Finishing-2 egg yolks blended with 1 tablespoon heavy cream

In a large bowl, combine flour and salt. Cut in butter and shortening until you have a fine meal. Don't freak out if you still have a few large pieces, it will get incorporated later.

Add the cold water quickly and any extra you need. Add just enough until you can bring the dough together in a ball. Taking a golf-ball sized bit of dough each time, take some dough and smear it against a work surface with the heel of your hand to incorporate the butter and shortening. When it is all finished, round it back into a ball and divide in two. Wrap each tightly in plastic. Chill at least an hour before using.


For the kasha:

1 lb. mushrooms (I used Baby Bellas) chopped
1 large onion, chopped
6 tablespoons butter, divided
2 beef bullion cubes dissolved in 2 cups boiling water
Ground pepper to taste
3 egg whites, slightly beaten
1 cup kasha rinsed and drained

In 3 tablespoons of the butter, cook the onion and mushrooms in a large pan (with a lid you will need later) over medium heat until soft. Push them to one side of the pan and add the remaining butter to the bare side. In a bowl, toss the kasha with the egg whites coating well, Add to the pan and cook, stirring constantly with a spatula until dry. Mix back into the onions and mushrooms. Add the broth and bring pan to a boil. Cover, reduce heat to simmer and cook until liquid is absorbed (about 20 minutes). Transfer to a shallow pan and cool on the counter for ten minutes before transferring to the fridge to cool completely.

For The Carrots:

6-8 large carrots, peeled and finely matchsticked
6 tablespoons butter
2 tablespoons sugar
1 1/2 cups beef broth
Salt to taste

In a large pot with a lid, cook everything together at a simmer, covered until carrots are soft (about 25 minutes). Remove carrots with a slotted spoon and bring sauce to a boil. Cook until reduced to a syrup. Return carrots to pot, coat well and then remove again with a slotted spoon. Cool completely before using.

Assemble The Pastry:

Roll out as thin as possible without it tearing. If making one large kulebiaka, make two rectangles. If making two, make four. I wouldn't go smaller than that. Mound the filling in the centre layering the kasha first and the the carrots. Leave about 1 inch around on all sides. Crimp edges with a fork. Cut a hole to vent the pastry. Transfer to an ungreased baking sheet and brush with glaze-then chill 20 minutes.

Preheat oven to 400 degrees F. For a large pastry, bake 1 hour rotating pan after 30 minutes. For smaller pastry, turn after fifteen and check frequently thereafter. Bake until deep golden brown. Let cool ten minutes before slicing.

Sweet And Sour Brussels Sprouts


I can't believe I've neglected to post this before, but checking the archive, it seems I overlooked it. We love this recipe for Brussels sprouts because it is simple and tastes as good cold as it does hot. I know it is popular these days to barbecue, or roast Brussels sprouts and that does indeed bring out a different flavour. Because the sprouts are blanched first, they don't get quite as "cabbage-y" as sprouts that were simply boiled to death.

You Will Need:

About 20 Brussels sprouts, trimmed and pierced through the bottom
A pan of rapidly boiling salted water
2 tablespoons salad oil
1/4 cup cider vinegar
2 tablespoons sugar
1/2 teaspoon salt
Black pepper to taste
3 tablespoons grated Parmesan cheese

Blanch the Brussels sprouts in boiling water for about 2 minutes. Drain, and refresh under cold running water.

Preheat oven to 350 degrees F.

Place sprouts in a single layer in a baking dish with a cover. Mix the remaining ingredients (except cheese) together and pour over sprouts. Top with cheese. Cover and bake 15 minutes or until sprouts are tender. Serve hot or cold.

Sunday, September 21, 2008

A Rumbling In The Distance

We were sitting in the dining room when a loud rumble was heard outside.

"Was that thunder?" asked my husband.
"No, farmer." I replied, without looking up.

A few seconds later he rumbled by with the large tractor. Hubby was impressed. What's more, I knew it was the Belarus by the sound, but no one likes a show-off.

Danny dragged me half asleep to the window earlier this week because Farmer Neighbour had his combine out. Usually, I only get dragged to the window with an excited, "Mama come look!" when Bubba is here to change the tractor tires. No really, he calls himself that, I'm not being condescending. Granted, if you've never seen tires changed on large farm equipment it really is something to see, but I didn't think I'd be getting dragged away from my coffee to gawk at Farmer's shiny red Case combine. I mean, it's nice, and costs more than most houses but still.

Danny has his heart set on being a combine for Halloween so I've started gathering materials for the costume. I have boxes and elastic to hold the thing up and some of those Styrofoam cones people use to make centrepieces. Those are for the corn head in front. I need to get out the glue and spray paint, but I've been stalling because I know as soon as I spray it red, he'll freak out and decide he didn't want to be a Case, he wanted to be a New Holland, and then I'll have to re-paint the damn thing blue. So we'll wait until he's positive about makes and models before painting. I suspect, after watching Farmer Neighbour's shiny red combine this week, we'll be painting it a case. We'll see.

As the woman at the supermarket who gave me the box noted;
"They never just want to be a ghost, do they?"

*Update

Danny just dragged me to his bedroom window (it faces their equipment shed) to see them backing large carts of hay bales into it by the light of tractor headlights. It's supposed to rain tonight and the hay shed was destroyed in the tornado, so I guess they're improvising. They're going to have a long night, I hope Danny isn't up until midnight standing at the window watching them. It must be funny to them, looking over and seeing Danny studying their every movements. At least, I hope they're amused. Maybe they can hire him in a few years.

I Know What You Eat For Breakfast

I cleaned out my husband's old car today. He's bought a new (old) car for commuting, and I have the Oldsmobile now.

I guess I should be thankful that I'm not married to an overly fastidious neat-freak but as I was sitting there rapidly filling the large trash bag with discarded fast-food wrappers and coffee cups it felt a little sad. I mean, I feed him well. I pack him lunches. There's just no excuse for buying a sausage biscuit sandwich at the gas station (I didn't even know they sell them until I saw the wrapper). I'd make him sausage biscuits for breakfast if I knew he liked them.

Among the items I pulled out of the heaps of trash in the backseat were some lovely coasters (?), a nice-ish dictionary, and a wool sweater from New Zealand that went missing a few years ago. I brought it in and washed it (twice).

"It smelled like a dead animal" I said.
"It is-sheep." He replied.
"They don't kill the sheep for wool-they shear them you idiot. You're Scottish, you should know these things."

As bad as it smelled before washing it was that much worse after, hence the second wash. Wet wool, motor oil and the funky residue of what was probably some other exotic gas station culinary delight. Ick. I think the problem has been solved and it can now go another ten years in the backseat of the car collecting whatever is tossed upon it.

Anyone have a good sausage biscuit recipe?

Friday, September 19, 2008

Chocolate Banana Cream pie


This is what you bake when you've been sick. Just when I thought I was better yet another wave of this crap hit me and I ended up at the hospital being treated for what they think was a migraine. By the way, it didn't help and it took two days to abate.

Anyway, I almost always make dessert on Friday and this was simple enough to throw together and I knew Danny would like it. Basically, it is the chocolate pudding recipe I always make thickened with a bit of flour and poured in a short paste crust. I told you it was easy. I was able to make it in stages (because heaven knows, I ain't up to standing on my feet very long) and the filling cooks in about five minutes.

(If you want to see a professional take on banana cream pie by someone that knows what they are doing-go HERE. Isn't that just beautiful? She's so talented it blows my mind).

As I was cutting a piece late in the afternoon to get a photograph, Danny wandered into the kitchen:

Danny: Do you need someone to test your pie?
Me: (Laughing) OK, would you like a small slice?
Danny: You'd better let me try a large slice to test.
Me: Oh, of course. you need to be sure.

I gave him a plate and he ran off to the table to dig in. I returned to photographing my pie when Danny returned bearing an empty plate.

Me: So how, was the pie?
Danny: I think I need to test another piece to make sure it is good.

Five minutes later...

Danny: (almost overwrought) Mama, I can't concentrate on playing unless I have more chocolate.
Me: Well, it's getting close to dinnertime...
Danny: But I can't think! (Waves arms in frustration) I can't think about anything but that pie!


It was a very good pie. It has a short shelf life, but somehow, I doubt you'll have much trouble getting rid of it. I'm expecting Danny to wake up at three AM unable to sleep knowing that pie is just sitting in the ice box all alone!

You Will Need:

A fully-baked pie crust (I used the short paste recipe in Mastering The Art Of French Cooking because I knew it would hold up to a wet, heavy filling)

4 ripe bananas
1 1/2 cups sugar
3 squares unsweetened chocolate (3 oz.) chopped fine
1/2 teaspoon salt
2 1/2 tablespoons cornstarch
1 tablespoon flour
3 cups milk
3 egg yolks
1 tablespoon butter
1 1/2 teaspoons vanilla

Whipped Cream (I used about a cup, but you may prefer a thicker layer or just dollops here and there)

Chocolate shavings

Bake crust and slip carefully out of baking dish to cool on a rack completely. This will keep it from getting soggy. When cool, return to dish.

Prepare filling:

In a large saucepan, combine sugar, salt, chocolate, cornstarch and flour. Slowly whisk in the milk. Over medium heat, cook whisking constantly until it comes to a boil. Cook one minute longer. Remove from heat. Place eggs in a medium bowl. Add a few ladles of pudding to it and whisk until smooth. Return to large pot and whisk in slowly returning to a boil. Cook one minute longer. Remove from heat. Whisk in the butter and vanilla. Cover with cling wrap, punch a few holes in the film with a knife, and let cool. Five minutes on the counter then in the fridge.

Slice bananas and place in the pie as neatly as possible. Cover with chocolate filling (You'll probably have extra-save it covered). beat whipping cream until stiff and add sugar as desired. Spread generously on top . Sprinkle with chocolate shavings.

Almost Too Pretty For Garlic Bread


-But that's what the loaves are destined for tonight. I dressed them up by brushing them with egg white and placing sage leaves on as decoration. Then I brushed them again. This technique works best with bread that won't be baked in an oven with steam.

For the garlic bread:

Bread (of course)
5 tablespoons unsalted butter (I used homemade)
salt and pepper to taste
1 teaspoon dried basil
3 tablespoons finely grated Parmesan cheese
4-5 cloves soft, roasted garlic. Mash it all together and slather it on split loaf of bread. Stick under the broiler for a minute or two.

Tuesday, September 16, 2008

Honey Cake


Every year at the Jewish High Holidays I bake honey cakes. Over the years the number of cakes I need to bake has dwindled as people on that side of my family have died off. At the peak of my honey-cake baking in the early 90's I probably did about seventeen. Last year, it had dwindled to three, including ours. The funny thing is, honey cakes are like Christmas card lists-just when you get them down to ten or fifteen, new people get added to the list and before you know it, you're back to buying a large box of cards rather than a few handmade ones. I suppose the funny part is that the new recipients aren't Jewish, but honey cake seems to have ecumenical appeal. They're popular in our inter-faith family anyway.

The one person who has been a constant on the honey cake list for the last couple decades is my friend Evelyn. Aside from the few years when she decided to pack up and move to Israel (and subsequently, move back to New England) I've sent a honey cake to her at Rosh Hashanah. I've been doing this for close to twenty years and I'm not about to stop now. I used to bake beautiful round, raisin challahs as well, but this year, time just got away from me. Still, who wouldn't be happy to open a box of honey cake, a jar of mulled honey and assorted jams and jellies? A few of the cookies from the previous post, and it makes for a lovely start to the New Year.

The recipe I've always used is really more of a fruitcake than a honey cake. Full of chopped apples, raisins and crystalised ginger it gets an extra kick from Calvados or brandy or some years, both. Everyone likes it and it lasts forever. I've also been making it forever-so I tried something new and arguably more traditional.

A honey cake is really just a spice cake with honey and strong coffee in the batter. They are usually on the plain side. The recipe I settled on using is somewhere between the two. While it does not use booze or fruit, it has egg whites beaten separately and folded into the batter to create a lighter, less "quick-bread" like cake. Unlike most quick breads, it did not split as horribly on top as most do (it did some) and it came out of the pan perfectly clean. I'd go as far as calling it beautiful. The recipe did not call for it, but I topped it with slivered almonds, which I did my best not to touch (allergic, though almonds were never as lethal to me as cashews and pistachios). For our family, we'll omit the nuts.

The house smells wonderful from the scent of cloves and honey baking. Honey cakes (much like fruitcakes) improve upon storing which makes them perfect for shipping long distances. They are also wonderful sliced and toasted on a baking sheet in the oven and served with cream cheese and an additional dribble of honey. I had a neighbour years ago that would let part of it go stale and then make a sort of bread pudding out of it, but I always thought that was overkill. My husband likes to use a slice as a base for ice cream, and I've been known to drown a slice in Golden Syrup for breakfast. This recipe makes one large loaf or two standard sized bread loaf pans. The recipe suggested 90 minutes, but mine was done in an hour, so depending on the sized pan, I'd start checking at 45 minutes. It is done when dark brown and a tester comes out clean.

If you prefer a honey cake with apples and raisins, try THIS one, which is also delicious.

Adapted from, A Taste Of Tradition by, Ruth Sirkis, 1971 (She's sort of the Israeli Delia Smith who taught a generation how to cook).

You Will Need:

4 eggs, separated

¾ cup sugar

1-cup honey (12 oz.)

1/3 cup salad oil (I used Canola)

3 cups all purpose flour

½ teaspoon salt

2 teaspoons baking powder

1-teaspoon baking soda

½ teaspoon ground clove

½ teaspoon ground allspice

3 teaspoons instant coffee

1-cup hot water

Slivered or sliced almonds to top, if desired

Preheat oven to 325 degrees F. Grease either two regular sized, or one large loaf pan lightly and set aside.

Prepare the coffee in the hot water and set aside to cool.

Separate the eggs with the yolks in a large mixing bowl and the whites in a medium sized bowl (copper is best if you have one). Beat the yolks and sugar until creamy and light. Add the oil and then the honey beating well after each addition. Beat until smooth and creamy.

Sift the flour and measure again. Combine with salt, baking powder, baking soda and spices. Add the dry ingredients to the egg yolk mixture alternating with the coffee. Do not over mix-use a wooden spoon and mix just until blended.

Beat the egg whites until stiff and peaks will hold. Fold egg whites into mixture 1/3 at a time until combined. Do this carefully and with a light touch.

Pour into the prepared pans, top with almonds, and bake until dark and a toothpick comes out clean. This can take anywhere from 45 minutes to 90 minutes depending on the pan size. Keep an eye on it. I baked mine atop a baking sheet-just in case of overflow.

Cool five minutes in pan, then completely on a rack. Wrap tightly when cool and store a few days before serving.

What I Did During Naptime


It's just easier to work while Danny naps.

I made about three dozen of these to send out as gifts with preserves. If I can manage it, I might make the chocolate covered caramels to send along as well. Maybe a few candied apples.

I deliberately drew the lines by dripping the frosting off the edge of a knife to keep it informal looking. I was afraid piping it on by pastry bag would look too rigid and perfect against the somewhat blurriness of the cookie colours. Not sure the overall effect worked, but it is pretty close to what I had in mind. Getting that purple colour just right was a frustrating exercise though.

Monday, September 15, 2008

Feeding A Vegetarian Child

This lollipop is not a whole food. It lights up too! You Get stuff like this when You're sick. I have to buy him stuff like that once in a while...to make up for the bad home haircut. Yeah, he's looking a little shaggy.

This meal IS good for you. Chick pea croquettes, baked apples with rice, carrots and red peppers. Meatless, and tasty.
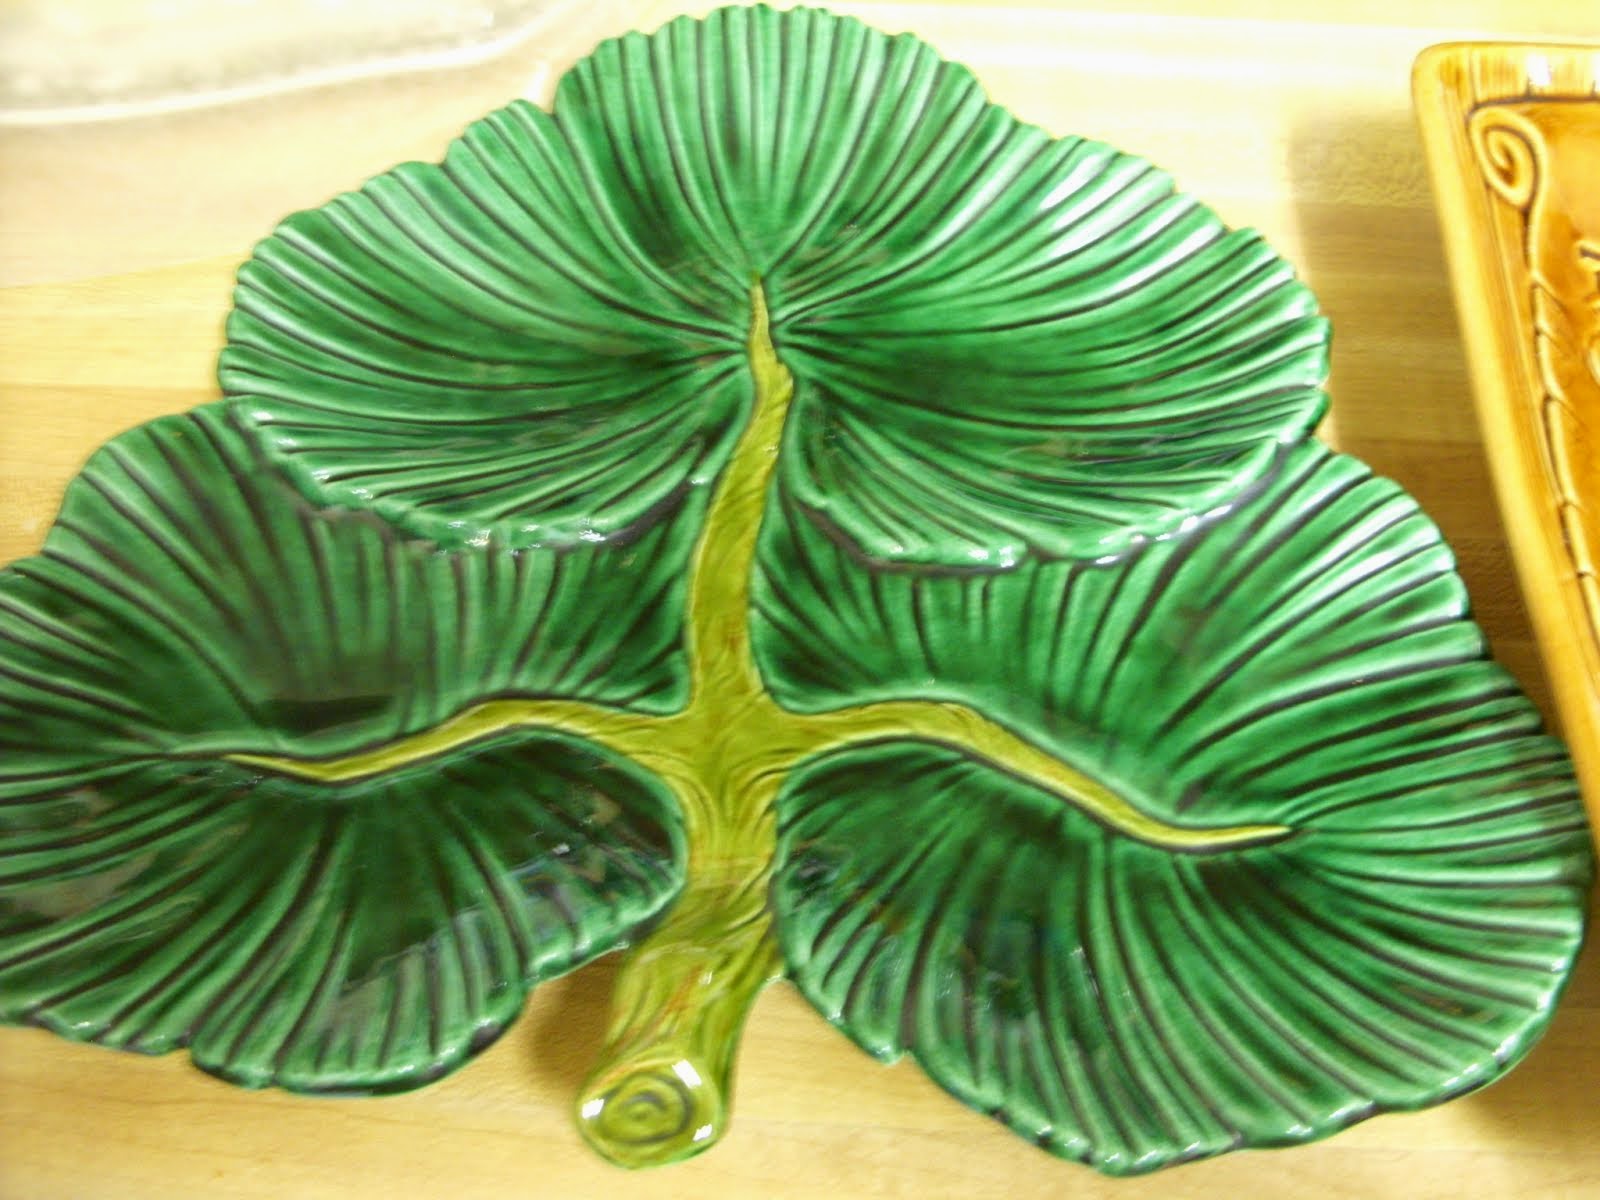
Savoury fruit. Apples get filled with rice, raisins and celery. Does this look like a boring vegetarian meal? I think not.


I suppose I have it easy, as Mr. Eat The Blog will pretty much eat whatever is put before him without complaint (and I humour him with the occasional goat tamales or roast rabbit). Except aspic-he hates anything in aspic. Danny isn't that particular either, as long as it is not winter squash-he hates winter squash.

The reason I mention it is Rebecca at Girl's Gone Child is trying find a comfortable balance with feeding her son (he's around Danny's age). The comment thread was mostly supportive (interspersed with the usual finger-pointing idiots) which to be honest, is refreshing. Danny's diet is complicated and there are reasons for it but I swear, if anyone ever confronted me and demanded I justify it, medically or otherwise I think I'd blow my freaking stack. Thankfully, it never happened with the formula he needed but I suppose being prescribed it was sort of out of view of busy-body sorts as I picked it up at the pharmacy (Man, $117.00 a week for that stuff and the insurance wouldn't cover it because they considered it food! You needed a prescription for it, but I guess if it is eaten they find a way of not covering it-bastards!). I understand concern, but not from total strangers that want to tell you feeding your son tofu will turn him into woman and make him grow ovaries (it won't-for heaven's sake people, take a damn science class).

Anyway, because of Danny's complicated dietary issues, I've had to avoid preservatives, artificial flavours and heavily processed foods that can give off false positives. That's not a huge deal because I know how to cook. Baking my own bread, crackers, and so on isn't that big of a hassle. Sure, sometimes he eats processed food (I let him eat Chips Ahoy cookies once and heaven knows they sure don't qualify as a whole, natural product) and I even bought him a (very) strawberry scented light-up lollipop recently, but at least I was on guard that he might start manifesting symptoms and I'd now the cause-if he ate that way all the time it would be more difficult to isolate. Unfortunately, that means being vegetarian without the help of products like frozen veggie burgers, sausages, etc. Just because they are vegetarian doesn't mean they aren't filled with tons of preservatives, etc. It's too bad actually, because those veggie corn dogs are probably the best food ever (I lived on those when I was expecting).

Danny does eat eggs, cheese, and other milk products which makes it somewhat easier-I don't know how I'd feed a child a vegan diet without constantly worrying about B12. I know people do it, but not being able to do nuts makes it all that much more difficult.

Here's my basic diet for Danny:

Breakfast:

Oatmeal w/skim milk
Toast
Jam (homemade, of course)
A bowl of banana
Glass of milk (about 4 oz. as he has milk in the oatmeal)

Lunch:

Either a sandwich (cheese and jelly is a favourite here) and soup
or
Beans and rice with yoghurt and both a green and orange vegetable (usually spinach and sweet potato)
or
A scrambled egg, toast and the green & orange vegetable combination with cottage cheese

Dinner

Whatever the family is eating:

Pasta with vegetables, beans, tofu, etc.


Quiche, vegetarian pizzas, lentil loaf-all hearty meals that leave no one hungry. I try to work in both beans and eggs every day (or tofu) so that we have enough protein. With all the milk and cheese, I'm not worried about any deficiency diseases around here. On average Danny gets about 1 1/2 cups of vegetables every day. He also gets dessert-usually pudding or something I can count on to make up some of the protein if he ate light that day. Grains like rice, cous cous, pasta, and buckwheat round it out. He eats a varied diet, though like most children would eat a grilled cheese sandwich three times a day for the rest of his life if permitted (actually, I'd do that too-grilled cheese is easy to make). We don't do a ton of juice, (usually just once a week at dinner) but when he's sick (like now) he's been getting apricot nectar to help out with potassium. Raisins are good for that too-and Danny is in love with raisins.

So let's talk about the typical meal pictured above. This was tonight's dinner. The apples are hollowed out and filled with jasmine rice, raisins, sultanas, fresh ginger, celery, onions, fennel seeds, turmeric and cooked in some homemade butter. I baked them in a 350 degree oven with a bit of water in the pan for 30 minutes.

The vegetable is carrots, red pepper and onions cooked with a bit of fresh ginger in olive oil. The croquettes were mashed up chick peas, fresh breadcrumbs, an egg some oil, and parsley. Sort of like a lazy person's falafel. I fried them in very hot oil for about a minute each side, drained them and kept them warm in the oven. We also had a Sally Lunn bread. The meal took about an hour to make, except of course for the bread. The vegetables I prepped throughout the day and kept in covered bowls in the fridge. The leftovers are going to work for Mr. Eat The Blog's lunch on Tuesday.

I guess the point I am trying to make is that frozen convenience foods are great (but expensive) if you can use them, but it is also simple enough to make a large batch of pesto and freeze individual servings that can be tossed in a pot when dinner is running late. I try to cook in quantity so that I have plenty of meals on-hand if life gets busy (or more commonly, if I get sick). You just can't go wrong with frozen sauces and pasta. I always have 3 or 4 loaves of bread in the freezer.

Finally, learning to make curries will help a great deal, particularly if you use red lentils which do not require overnight soaking and cook quickly. If you do soak and cook beans, they can be frozen easily which is as simple as opening a tin (without all that extra salt).

The key to feeding a vegetarian child isn't that much different than feeding an omnivore-it needs to be accessible and simple to manage (I've yet to meet a child that will deal successfully with a serving of peas piled on the plate alone-they are too frustrating, even with a spoon). Mix the peas with rice and everyone is happy. Mash them with potatoes and curry powder. Make mushy peas (you need dried marrowfats for that though). A child will be turned off to any food they feel is unwieldy. That does not mean I'm advocating serving only sandwiches or finger food, rather just trying to keep a child's skill level in mind when introducing foods.

It sounds like an overwhelming amount of work, but it really isn't. If anything, it is a matter of time management over kitchen skill. Do I cheat sometimes and open a tin of beans? Of course I do. often? No, not really. After the tornado we had to be creative feeding Danny though the brightly coloured cold cereal the well-intentioned ladies at the hotel desk were feeding him didn't seem to do any harm (which was funny because my first thought was, "excellent, he can eat Apple Jacks-woo hoo, another "safe" food." Sometimes, I find these things out by accident as I'm a bit reluctant to just shove a Twinkie at him and say, "hey, eat it and see what happens."

One last thought-feeding a child a vegetarian diet does mean they will be limited in food availability choices away from home (at least in rural Nebraska). With that in mind, I've been making sure Danny learns to cook and understands how bread is baked, beans soaked, etc. I think that's always good for a child to be exposed to, but almost essential if they will someday be forced to feed themselves without the benefit of prepared foods.

After a while, it does get easier. Once certain staples are established in the larder it makes meal planning more routine. Keep a bag of carrots on hand and a couple onions and you have a good start to most meals. Throw in a tin of chick peas and some pasta and you have dinner.

Sunday, September 14, 2008

Mandarin Orange Jelly

Like sunshine in a jar.

I had some beautiful Australian Mandarin oranges so I adapted the recipe for tangerine jelly in the blue book. I made three pint jars, but you could also do half pints. Because the lemons have been so thick skinned lately, I advise buying a few extra-just in case they don't yield enough pulp-not a bad idea for the oranges/tangerines either. You never know if you'll hit a dry orange in the bunch.

This was incredibly easy and the way the steps came together allowed plenty of time to clean-up in-between. We'll keep one jar for ourselves and a couple of lucky people will get the others for Christmas. I might need to make a few more batches.

You Will Need:

6 cups chopped Mandarin orange pulp (about 3 1/2 pounds-but buy extra)
1 cup chopped lemon pulp (I needed 4)
1/2 cup thinly sliced Mandarin orange peel( peel closely so as to avoid pith) (about 3 medium)
1 cup water
1 package powdered pectin
5 cups sugar

To Prepare Juice:

Combine tangerine pulp, lemon pulp, peel and water in a large pot. Cover, and simmer ten minutes, stirring occasionally. Strain juice through a damp jelly bag. You'll need four cups of juice. This might take a while, so why not do the dishes at this point-you'll need the pot again.

Measure 4 cups of juice and place in pot with the pectin. Bring to a boil over high heat, stirring constantly. When juice comes to a full rolling boil, stir in the sugar and keep stirring. When juice returns to a full rolling boil, cook one minute longer and remove from heat.

Pour into pints or half pints prepared and heated according to USDA guidelines leaving 1/4 inch head space. Wipe threads clean, place heated lid in place and adjust screw bands fingertip tight. Place in canner.

Lower jars, cover canner and bring to a full boil. For pints, process 15 minutes, half pints 10. Remove lid, turn off heat and let stand five minutes before removing to a towel to cool. Let cool 12-24 hours before checking for seals.

Saturday, September 13, 2008

It's Concord Grape Time!-Updated


I might have gone a bit overboard in purchasing. I'll probably pick up a few more quarts to make freezer puree (I have a few recipes that use frozen Concord grape puree that I'll try to post while they are still in season). Living far away from the Finger Lakes region the grapes were a bit pricey, and you probably won't save much by making your own jelly and juice. Still, nothing in the supermarket can compare to the taste of Concord grapes you canned yourself.

The jelly recipe takes two days because the juice needs to sit 12-24 hours in the fridge. Grape juice has a tendency to develop crystals which need to be strained away the next day before canning.

I'll update the post when the canning is completed and I'll have a few pie recipes that use Concords as well. If you live in Eastern Nebraska, get your butt over to 180th and Q Street to the Hy-Vee before I buy them all (I made good on the promise to buy all the prune plums-I bought the last few pounds this morning). Hurry, hurry, hurry.

As an aside-does anyone know if the international shippers like UPS and Fed Ex use pressurized compartments in their planes? I'm trying to figure out if shipping jelly internationally would be worth it or if the seals would relax and then re-seal under pressure. Anyone have experience with this? I'd appreciate any advice.

More Concord-palooza tomorrow.

Day Two Update:

It is all done. I'll give you the recipe for the grape puree concentrate for the freezer and Concord Grape Jelly with pectin. I'll also provide a couple pie recipes at the end. After all was said and done, I ended up with an extra cup of grape juice which we intend to split three ways at dinner. The jelly is a two-day job because of the juice making, but well worth it. We sampled a bit of the leftover jelly in the pot and let me tell you, that is good stuff. Take that Smuckers!

For The Grape Jelly:

Prepare the juice a day ahead:

About 6 dry quarts of Concord grapes (best to make extra though you can add water if you run up short) washed, stemmed and slightly crushed with a potato masher.

For each liquid quart of fruit, add 1/4-1/2 cup water

Cover the pot and simmer until fruit is soft-about 20 minutes. Strain through a jelly bag. Note-this will go slowly after the initial liquid drops through. It can take an hour. Place strained juice, covered in the bowl in the fridge and let stand 12-24 hours. Strain through jelly bag again to extract any crystals that might have formed. Prepare the jelly as follows:

For 8 half pint jars:

Prepare jars and lids for canning following USDA safety guidelines.

You Will Need:

4 cups prepared grape juice
7 cups of sugar (not a typo)
1 pouch liquid pectin

Put grape juice in a large pot. Add the sugar stirring until completely dissolved. Bring to a boil over high heat. Add pectin and bring back to a full rolling boil. Cook 1 minute stirring constantly. Remove from heat. ladle into 1/2 pint jars leaving 1/4 inch headspace. Adjust caps and process in boiling water caner ten minutes. Remove lid and kill the heat. Let cool five more minutes in canner. Remove to towels to cool 12-24 hours before testing for seals.

For The Frozen Grape Puree:

The recipe for the puree comes from my 1960 edition of The Farm Journal Freezing And Canning Cookbook. Many of the recipes do not follow current canning guidelines but can be adjusted to modern methods and it is a wonderful book to own. The freezer puree is easy enough and though I stored it in freezer-safe glass jars, you may wish to use bags or plastic containers better suited to today's freezing methods (I like jars because they keep a neat freezer without bags slipping around.

The puree is a bit of work as you have to put the grapes through a food mill. Three dry quarts of grapes yielded five half pints of puree but you really need to extract every last drop of pulp from the skins. As I removed the skins and seeds from the food mill to grind the next batch I set the discards aside in a bowl and at the end put them through again-to my shock, it yielded quite a bit of extra pulp.

Makes 5 half pint jars of puree:

Wash and stem grapes. In a large kettle, heat the grapes8-10 minutes over low heat (not over 145 degrees F.). Do not boil. When skins begin to loosen, put the grapes through a food mill. Discard skins and seeds. Pour puree into clean jars leaving 1 inch headspace. Seal label and date. The puree can be used in numerous recipes including the fluffy grape pie at the end of the post. A note-I have not made the fluffy grape pie, but expect to later this week, so if you are viewing this without a photo, check back for an update before making it-or prepare at your own risk. The Concord grape mini-pies and fruit topping I have made.

Fluffy Grape Pie:

1 cup grape puree, thawed enough to measure
1/4 cup water
1 3 ounce package lemon gelatin
3/4 cup sugar
1 1/2 cups heavy whipping cream, whipped
1 baked 9 inch pie shell

Bring grape puree and water to a boil. Stir in gelatin until dissolved. Add sugar and mix well. Chill until mixture mounds when dropped from the spoon, stirring occasionally. Beat until fluffy. Fold in whipped cream. Pour into pie shell. Chill at least two hours or overnight. Serve topped with additional whipped cream.

Foe Concord Grape mini-pies (that were mind-bogglingly delicious) click HERE. The filling is versatile and also made a killer ice-cream topping. Photos accompany post.

Friday, September 12, 2008

What Is That thing?

No, this cake never need be baked-the visual along with the article is enough. I couldn't serve this to any children I know-not with a straight face. Oh look kids, it's a "raspberry milkshake cake! No, it is a pink monstrosity-sort of like Pepto Bismal ganache.

In the interests of being fair, I asked my three year old what it looked like to him:

Mama: What do you think of this picture?
Danny: What is that thing?
Mama: Cake.
Danny: It is not.
Mama: No really, it is.
Danny: Did you make that thing?
Mama: No, Dan Lepard did-he's famous.
Danny: (scrunching up face) It's a very pink thing.

And it looks like Pepto. I could see baking one of these with wintergreen flavouring as a joke.

Apple Cherry And Raisin Pie


Since Crisco was changed to be trans fat free it no longer makes decent pie crust-this is a source of great irritation. I spent years perfecting my pie crust only to be brought back to the beginning again. I made this crust using all butter and while Danny and Papa liked it, I did not. Maybe I need to try half and half. The flavour was fine, but the texture was almost like very soft bread. That was odd, as butter crusts are notorious for being tough. Anyway, it is back to the drawing board and if anyone has a wonderful lard-free pie crust recipe to share, I'm all ears.

The filling was straight forward and delicious though on the less-sweet side.

You Will Need:

Unbaked double pie crust
6 cups peeled, sliced apples (I used local Macs)
2 cups pitted cherries (I used the ones I froze in July)
1 cup raisins
1/4 cup flour
1/2 cup sugar
1 teaspoon cinnamon
2 tablespoons water
2 tablespoons butter for dotting
cream for brushing top crust
extra sugar for sprinkling top crust

Preheat oven to 375 degrees F.


In a bowl, mix the apples, cherries and raisins together. Pile in pie crust keeping the centre higher than sides.

Mix together flour, sugar and cinnamon. Spread over fruit in crust. Drizzle on water. Dot with butter pieces and top with crust. Vent in several places. Brush with heavy cream and sprinkle with sugar.

Bake at 375 degrees F. for about an hour. Mine went an hour and fifteen minutes, but you should keep an eye on it.

Nepalese Tofu And Pea Curry


Danny requested something for dinner with tofu and peas-he was rather specific about it. A quick Google search and I found THIS wonderful recipe at Zlamushka's Spicy Kitchen. It isn't often that a small child will tell you dinner was exactly what he had in mind, but then Danny is rather partial to curries. I'm partial to them as well-they're quick, particularly if you prep the ingredients here and there throughout the day.

Unlike most curries I make, this one isn't filled with a ton of oil or coconut milk, so you could argue it is on the healthy side. I served it with jasmine rice, pear chutney and yoghurt.

Thursday, September 11, 2008

Learning To Write, Spell, And Handle Botched Blood Transfusions


I haven't really spent a great deal of time teaching Danny how to write. He's made a few letters here and there and I praised the effort but didn't want to make it seem like a drill. I'm not really sure a child needs to be able to read and write at 3 1/2 and I worry a bit about him burning out too early. I keep it a fun activity rather than a study.

Danny's been able to spot words he knows for quite some time, but I wouldn't call it 'reading" (many people would). For the last month or so, he's been interested in spelling words and is getting pretty good at sounding them out-even starting to see a pattern to silent E. I was sort of hoping I'd be able to spell when I didn't want him knowing what we are talking about, but now I'll be forced to speak Gaelic. Yesterday, he took the next step and began writing down the words he'd been spelling. The sideways "A" needs some work, but we have otherwise very good examples of "Dan" and "Map."

I know I couldn't do that until at least kindergarten. My mother made sure I could spell my first name before starting school (because I had what was then a very unusual name with an odd spelling that teachers would never spell correctly) but I doubt I could have picked words out of the blue, spelled them and written them on paper. I don't think I could do that until the end of first grade.

Still, as impressed as I am, I don't want to use this as an opportunity to immerse Danny in writing activities. I have serious doubts regarding the value of reading too early, and tempted as I might be to think this displays some super-genius tendencies, it probably isn't the case. More likely, he's grown up in a house full of books (oh heavens, do we have books) and by seeing us reading got curious as to the content of all those books holding our interest.

So no flashcards or phonics tapes quite yet, but I did have to post the photos before I busted my buttons with maternal pride.

The other photo is Danny playing train conductor with placemats. Part of playing conductor is my husband asking a question and Danny problem solving:

Papa: Conductor! Conductor! I have a problem.
Danny: What is the problem sir?
Papa: I asked for chocolate pudding and the porter brought me squash.
Danny: Well, I can take it away and bring you pudding.
Papa: Thank you conductor.

Or,

Papa: Conductor! Conductor! I have a problem.
Danny: What is the problem sir?
Papa: I asked for a blood transfusion of type A and they gave me B!
Danny: Well (pauses to think) we'll just take it out and put in B instead.
Papa: Oh, thank you conductor!


See? Easy!

Hey, Hey, Nice Lady?

Danny now has the cough (and sinus infection) as well. We drove to the paeditrician through a downpour. We've been in such a drought these past few years, I'd almost forgotten what that sort of rain is like to drive in.

I made a pot of Matzo ball soup and I rented movies. We have antibiotics and cough medicine and if all else fails, I'll run out for comic books.

Danny has this cute thing where he will hand female cashiers whatever we're buying and in a very Jerry lewis-type voice, say:

"Hey, hey nice lady, can we buy this?" Usually, people laugh because it is so nerd-like. I'll probably regret this, but I rented The Nutty Professor. I had to. I also rented Pete's Dragon, but I'm pretty sure Danny is going to be captivated by Nutty Professor, which as I already stated, I'm sure I'll live to regret.

I've felt better for the past four days but now it seems to be coming back. Eventually we'll all get well-right? Right?

Damn right, nice lady.

Wednesday, September 10, 2008

Spiced Pears


The recipe called for large pears, but I used Seckel and cut the cooking time in half. Yes, I know the food colouring is considered tacky these days, but the recipe comes from the 1950 edition of the Betty Crocker Picture Cook Book and I was in a mood to do something colourful. If the food dye offends your sensibilities, feel free to omit it.

You Will Need:

6 large pears, or 12 miniature
1 1/3 cups sugar
1/3 cup water
2/3 cup vinegar (white)
1 1/2 sticks cinnamon
12 whole cloves
food colouring if desired

Carefully pare the pears and let sit in water that has been treated with a teaspoon of lemon juice.

In a small pot, combine everything else-except food colouring. Cook 20 minutes at a boil until thickened. Drain pears and pat dry. Add to syrup and cook 35-40 minutes for large ones, about 20 for small. Frequently spoon syrup over pears in pan and turn once in a while to coat.

Tuesday, September 09, 2008

Pizzas And Canned Plums In Syrup


There's two different types of plums-prune plums and black plums. Isn't the colour beautiful? I decided to split the prune plums and pit them so I could cram more in a jar. I raw packed them in hot syrup and about half an hour ago the last seal "pinged." I used a medium syrup which seems appropriate for plums. Someday I'll have to try using honey.

The pizzas were experimental and Mr. Eat The Blog (who now has the virus that had me laid up for six weeks) said he enjoyed it, though I don't know how he can enjoy anything, coughing like that. Danny is starting to cough too. Not surprising, but I really had been hoping it would miss them.

I used my regular pizza dough recipe but added 1/2 a cup of olive oil. This helped make the dough light and focaccia-like. The topping were as follows:

Pear/Chevre Pizza

Boiled red potatoes, thinly sliced
1 large French pear, thinly sliced
1/2 cup chopped parsley
a few slices of red onion
About 10 fresh sage leaves
About 1/2 tube goat cheese
1 cup grated Swiss cheese
Olive oil for brushing crust
Pepper


Vegetable Pizza:

1 large tomato, thinly sliced
1/23 cup chopped parsley
1 thinly sliced green pepper, in rings
1/2 red onion, thinly sliced
about 10 black olives, chopped
4-5 sage leaves
1 cup grated provolone cheese
1/4 cup grated pecorino Romano
1/4 cup grated Parmesan


I baked them in a hot (475 degree F,) oven on the bottom shelf for 5 minutes before transferring to the middle rack for another 5-7. Again, this will be enough food for tomorrow evening's meal,though I wonder if I ought to toss together a pot of soup for the infirm.

Sooner or later, we all have to get over this bug, right?

Monday, September 08, 2008

Prune Plum And Orange Freezer Jam


This is an experiment, and I probably won't know how well it worked for a week or so. I'll update the post when I try the final result, but if what came out of the pot is any indication, it is going to be good. I made this knowing I'll be preparing two ducks at Thanksgiving and I'll use this with ruby port for a glaze. Even if the set is soft, it won't matter for my purpose. This wasn't a recipe adapted for regular liquid pectin, so I had to guess at how much sugar to add. I based it on the freezer jam recipe in The Ball Blue Book, but I didn't have freezer specific pectin. I'm sure it will be fine, but don't try it (unless you're feeling adventurous) until I have a chance to update with any adjustments.

You Will Need:

50 prune plums, pitted and finely chopped
1/2 cup water
1/4 cup chopped orange pulp
Grated zest of an orange
1/2 teaspoon ground mace
6 cups sugar
1 packet liquid pectin

Chop plums and place in a large pot. Add the water, bring to a simmer and then cover. Cook 5-7 minutes or until slightly soft. Transfer to a large bowl and add the orange, zest, mace and sugar. Stir well and let sit fifteen minutes.

Stir in the pectin and continue stirring for three minutes or until all sugar is dissolved. Pack in freezer jars leaving 1/2 inch headspace. Wipe threads clean and seal. Let stand at room temperature for 24 hours before transferring to freezer. Makes 8 half pints.

Eggplant Salad


I followed THIS recipe exactly, except for the sesame seeds, which I replaced with black sesame seeds. It was tasty enough, and salting and draining the eggplant kept it from getting that astringent taste eggplant can get. Would I make it again? Probably not. It was simple to do, and there wasn't really anything wrong with it except that it was kind of bland for our tastes. I imagine it would go over well with people that like Asian style cookery.

Liptauer Cheese


Traditionally, this would have capers in it. I skipped them. This was a good use for the homemade butter, and Mr. Eat The Blog was pretty impressed. You can turn this into a dip by beating in a half cup of sour cream at the end, if you wish. Store tightly wrapped in the fridge for a few days.

You Will Need:

8 ounces cottage cheese
8 tablespoons (1/4 pound unsalted butter)
1 tablespoon sweet paprika
1/4 teaspoon salt
2 teaspoons caraway seeds
1 teaspoon dry mustard (you can decrease this if you prefer something with less punch)
1 tablespoon dried, minced onions
1 tablespoon minced chives

With a wooden spoon, mash the cottage cheese through a strainer. Cream the butter and mix with cheese and spices. Stir in onions and caraway seeds. Beat until smooth. Spoon into a bowl and chill several hours before serving.

Butter


Danny didn't believe I could make butter with a hand mixer. Well, I showed him, didn't I? Mr. Eat The Blog drank the buttermilk because he loves it (ick).

Here's what you do:

Pour heavy whipping cream in a bowl. First it will turn to whipped cream. Then, a thicker version. Then, at about the five minute mark, it will start to separate into butter and liquid. Drain the buttermilk, mould the butter and chill. Impress your three year old. The 48 year old was pretty impressed too.

Sunday, September 07, 2008

Sausages In Creamed Cabbage With Roasted Potatoes And Apples


This hearty meal (that only Mr. Eat The Blog will eat) should serve him for a couple days, lunches included. That's my kind of cooking. The sausages were steamed in a pan of water for fifteen minutes, and the potatoes and apples tossed with olive oil and thyme and roasted in a 425 degree F. oven for about half an hour. The recipe for the cabbage is as follows:

Creamed Cabbage:

1 small head green cabbage, finely shredded
Boiling salted water
2 egg yolks
1/2 cup sugar (this is quite a bit, you may wish to reduce by half)
1/2 cup cider vinegar
3 tablespoons butter
1 cup heavy cream
Salt and pepper

Cover the cabbage with boiling salted water and cook until soft-about ten minutes at a full boil. Drain well.

In a small saucepan, combine the eggs, sugar, vinegar and butter. Cook over medium heat, whisking constantly until thickened. Add cream slowly and continue to cook until it boils. Adjust seasonings. Pour over cabbage and serve hot.

Saturday, September 06, 2008

Prune Plums And Pears


I'm not sure what made me ask, except that it is the right time of year for prune plums. The produce manager looked surprised and then told me he had just got in two cases of them and had no idea where to display them as he couldn't imagine anyone would want them!

Well, I wanted them, and not thirty seconds after he went in back to get them, another woman asked for the same plums. The poor fellow had a look as though he was expecting to be told he was on Candid Camera. Then he had a sort of odd look, I suppose because we were so excited-perhaps he was afraid we were going to try and kiss him. The other customer was going to make plum dumplings for her children. She asked if I was Czech, which is kind of funny if you've ever seen me (I can be mistaken for many nationalities but Czech would be quite a stretch) because prune plums figure prominently in their cuisine.

These plums were very fresh, and still a bit under-ripe, which is perfect. I'm not usually what you'd call an emotional sort of person, but when I saw those beautiful plums I darn near cried. I bought two large bags filled to the top, but somehow when I got them home and looked at them on the counter, it seemed like less.

I figured I'd raw pack them in syrup and can them whole-that is, until the boys began chiming in with other ideas.

"You're going to make some of the muffins, aren't you?" asked Mr. Eat The Blog.

"Oh, Mama could you make the plum pie with crumbles?" Danny wondered.

"And don't forget the dumpling sauce."


At least no one asked me to make a Plum Duff (I'm just not skilled at steamed puddings).

I'm still not 100% back to feeling well, but the season is so short for these wonderful plums that I'm considering calling tomorrow to see if he still has that other case and make an offer. As it was, he gave us the plums for the sale price on the regular black plums, which was pretty darned cheap. I think he was just delighted to see them sell. If you're in the Omaha area, the Hy-Vee on Q street in West Omaha has them (unless I get back there first-heh) and I suggest you hurry.

I also bought a bag of Jonathan apples from Iowa, because I have no willpower when it comes to Midwestern apples (In Illinois we had Golden Delicious that I happily lived on through college).

The pears? Oh well, I can't resist pears either-I bought red pears, French pears, and Seckel pears (oh-so wonderful canned in a ton of brandy). I'm envisioning a pear and goat cheese galette with red potatoes and herbs, but I'm sure some of them will end up in chutney.

Not pictured-much too much citrus in the form of Mandarin oranges, Cara Caras, and Australian juice oranges. At least we don't need to worry about scurvy.

Guess I have my work for the week.

The Closest I'll Be Getting To Hawaii


.99 cents at Goodwill-you would have bought it too. It is pretty old (can tell by the label) and appears to be a tourist item brought back from Hawaii (made in Honolulu). My husband (who lived there as a young child) took a look at it and did one of those eye rolls that silently say, "Oh my god, next you're going to be carrying a floral plastic shopping bag and offering me Jordan Almonds." Sure, it is somewhat old-lady-ish, but for heaven's sake, I'm an old lady! And I have absolutely no taste at all in clothing. For .99 cents I can indulge my tacky tendencies. I think it will look lovely with a black turtleneck and black trousers. It is still drip-drying, but the colour is pretty close when dry.

I did resist the urge to purchase the beautiful elaborate saris someone donated. I should have, as the fabric was gorgeous.